‾*‾‾*‾*‾‾*‾*‾‾*‾*‾‾*‾*‾‾*‾*‾‾*‾*‾‾*‾
‾*‾*‾‾*‾*‾‾*‾*‾‾*‾*‾‾*‾*‾‾*‾*‾‾*‾*‾‾*‾*‾
‾*‾*‾ ‾*‾*‾
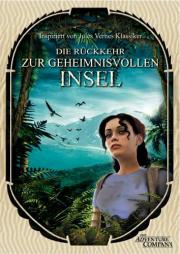
‾*‾*‾ "RETURN TO MYSTERIOUS ISLAND" ‾*‾*‾
‾*‾*‾ ‾*‾*‾
‾*‾*‾‾*‾*‾‾*‾*‾‾*‾*‾‾*‾*‾‾*‾*‾‾*‾*‾‾*‾*‾
‾*‾‾*‾*‾‾*‾*‾‾*‾*‾‾*‾*‾‾*‾*‾‾*‾*‾‾*‾
A FAQ/Walkthrough by Mr Haley
TABLE OF CONTENTS: (this walkthrough)
I. REVISION HISTORY
II. COPYRIGHT NOTICE
III. CONTACT INFORMATION
IV. A FEW STARTING TIPS
V. GAME WALKTHROUGH
VI. AFTERWORD
VII. ACKNOWLEDGEMENTS
<‾‾‾|‾‾‾|‾‾‾>
{I} REVISION HISTORY
v 1.0 15 December 2004
v 1.1 6 January 2005 added solution to 2 puzzles, minor
bugs/typos fixed, changed syntax
<‾‾‾|‾‾‾|‾‾‾>
{II} COPYRIGHT NOTICE
"Return to Mysterious Island" is a game by The Adventure Company.
Release date: 2004, November 2
Platform: PC
House: The Adventure Company
Developer: Kheops Studio
Publisher: DreamCatcher Interactive / The Adventure Company
Official Website: http://www.adventurecompanygames.com/
http://www.dreamcatchergames.com/
Min. Sys. Requirements: PIII 800, 64MB RAM, 64MB VRAM, 1GB disk space
Rec. Sys. Requirements: P4 1.5 Ghz, 128MB RAM, 64MB VRAM, 1GB disk space
My system: Intel Pentium 4 3Ghz, 512MB RAM DDR, 52x DVD-ROM drive,
nVidia GeForce 5700LE 256MB, DirectX 9.0c, Windows XP.
The game is very stable and flawless. It is mostly composed of high-
resolution background stills with little animation to them (though that
little animation there is is excellent), so it will run quite smooth on
low-end systems as well. The loading times might be longer, though.
<‾‾‾|‾‾‾|‾‾‾>
{III} CONTACT INFORMATION
THIS FAQ/WALKTHROUGH is the exclusive copyright of Haley Brimley.
Copyright (C) 2004-2005 Haley Brimley
You may use this walkthrough as you please, PROVIDED THAT:
1) you do NOT make any money out of it; that includes featuring it
in publications, compendiums, compilations and other media that
is in any way sold and/or rented;
2) the WHOLE content remains COMPLETELY unaltered, including this
and other disclaimers and property statements.
Legal action will be taken against transgressors.
The author of this FAQ/Walkthrough can be written to at:
haley_brimley2 (at) yahoo (dot) it
or at
harmless_vampire23 (at) yahoo (dot) co (dot) uk
<‾‾‾|‾‾‾|‾‾‾>
{IV} A FEW STARTING TIPS
4.1 "Backstory"
Mina is a round-the-world solo sailor whose ship is wrecked by a heavy
seastorm in the middle of Pacific Ocean. The girl is miraculously alive,
and finds herself stranded on a tropical island.
The place is tranquil and apparently deserted. There's no sign of any
indigenous or non-indigenous life apart from crabs, monkeys and seagulls.
Mina's cell phone has resisted the water, but batteries are low. Plus,
trails on the sand and a low humming sound coming from the underground
make Mina think not everything is as it seems.
The sailing record she was trying to break quickly forgotten, the girl's
one and only priority is staying alive in a hostile environment, figure
out a way to leave the island, and possibly solve a mystery several
centuries old, buried within the depths of lands and seas.
Based on "THE MYSTERIOUS ISLAND", the great adventure book written by
famous French novelist Jules Verne that marks another appearence of
Captain Nemo along with "20,000 Leagues Under the Sea". The game doesn't
exactly follow the book, but you'll find many elements you read about,
and the overall feel is perfectly recreated.
4.2 "Inventory"
Use the game manual in order to learn to play. If you own a pirated copy
and don't have a manual, be a good boy/girl and buy the game :)
The only technical tip I'm going to give concerns the Inventory. In the
tradition of classic graphic adventures, "RETURN TO MYSTERIOUS ISLAND"
features 100+ items to pick up, manage, use, and combine. That, plus the
brilliant assemble/disassemble method, can result in a mess if you are
untidy, so here's a tip to get yourself organized right from the start.
In your Inventory (mouse right-click) you have six boxes that can contain
up to 24 items each. Try and use them as follows:
1st box: Simple Organic Items (fruit, water, plants, animals, etc.)
2nd box: Complete Items (lamp, diving suit, cage, etc.)
3rd box: Tools (wooden fork, rock...) and Weapons (bow, darts, etc.)
4th box: Chemical Compounds* (sulphur, sugar, still, gunpowder, etc.)
* The game requires quite a number of chemical reactions, but don't
worry, they're explained briefly and well. No need to dust off high
school Chemistry textbooks!
4.3 "Bonus Points"
You get these with combining your items in creative ways, or after you
perform certain actions, or when you solve puzzles. You get one bonus
point by default every time you pick up an item, of whatever nature,
and every time you combine Jep the monkey with any item he can hold.
Hunting for bonus points adds a lot to the overall replay value, in my
opinion, and it's some really smart thinking on the developers' side.
Every 100 bonus points you are rewarded with one graphic-novel-styled
cutscene, and also, the game suggests that you look at the Picture
Gallery in the main menu. There are some moderately interesting artist
sketches there, and you can see how the digital version of island looks
exactly like the storyboards on paper. That's a cool, unusual treat.
Following this walkthrough step-by-step you will score 332. I think it
is the maximum possible, but some report having scored 351 or even 359.
<‾‾‾|‾‾‾|‾‾‾>
{V} GAME WALKTHROUGH
V.1 "THE BEACH"
* After the introductory cutscene, look around and get a feel of the game
by trying out the basic movements: certain actions will be required
often and you'd better learn to master them soon. Now. Mina needs to
eat to replenish her strength. The green bar you see on the left needs
to be full before we can do anything.
* Go toward the cliff away from the sea, and witness a ghostly apparition
that makes you understand things *definitely* aren't the way they look.
There's a seagull nest, but you can't get up there yet because it's too
high. You can get an EGG from the lower nest, though, and pick up a
RUSTY KEY/NAIL from the ground. Combine the NAIL with the EGG to drink
it and heal a bit.
* There's a blackened area left of the shoreline, a sort of little cave
in the wall. There was obviously a fire there, once. Pick up the
SANDSTONE and the FLINT. If you click on the darkest wall, Mina says
"Soot"... but no interaction is possible, apparently.
* Go to the wooden planks coming out of the sand, obviously the wreck of
an old boat. Use the SANDSTONE on the biggest plank with a metal cap.
You'll get some RUSTY METAL and DRIFTWOOD. Also pick up the WET SEAWEED.
* Combine the RUSTY METAL with the SANDSTONE to make a KNIFE. Combine the
KNIFE with the SANDSTONE in order to make a LIGHTER. You will need it to
light a fire, but you'll also need the individual pieces that make it,
so you can always disassemble it.
* Move towards the archway in the cliff, and collect OYSTERS from the
pond walls to your left. There are FOUR, one of which is by the right-
most underwater pole. DO NOT USE THE KNIFE to open them, or it will
break after the second! Wait just a little more.
* Move away from the archway and towards the palms. On your right, you
find LICHEN on the rocks. On your left, there's a TRUNK in the sand...
right where the trails on the sand lead. Use the NAIL on it to pick the
lock. There's a BROKEN TELESCOPE and some SILVER COINS. Use the NAIL on
the BROKEN TELESCOPE to pry out its LENS.
* Go towards the palms, and a GREEN COCONUT will fall behind you. Turn
around and pick it up. Buried in the sand, where there's a bump, you
find two more EGGS. Nail one and eat it. You'll need the other one
later, but you will also find more along the way.
* By the palms, pick up the YOUNG PALM, one GREEN COCONUT and one
BROWN COCONUT. Right there in front of you are two CRABS eating a
porcupine. If you try to grab them, they'll bite! So, grab them when
they're not looking. Get the PORCUPINE too.
* Combine the SANDSTONE with the GREEN COCONUT to break the outer shell
and get a BROWN COCONUT. Combine the KNIFE with the BROWN COCONUT to
have a STRIPPED COCONUT and COCONUT FIBERS that make a sort of cord.
Combine the KNIFE with the PORCUPINE to get QUILLS and a PORCUPINE
WITHOUT QUILLS (duh). You can also combine the KNIFE with each of the
COCONUTS you have in order to eat them and gain yet more health, but
you needn't eat more than two. Keep one.
* Go back to the "fireplace". You can now make a fire. LENS + LICHEN +
PALM will make a fire, or alternatively, use LIGHTER + LICHEN + PALM.
The result is the same. There are many ways to light a fire!
* Now you have a fire, select it and use it on the black area. Use the
OYSTERS on it to open and eat them. Use the CRABS on it to cook them.
Yum! Mina is getting better and better. You can also use one EGG on
the fire to eat it.
* Go towards the ascending slope in the crack on the mountain, to the
left of the fireplace, and pick up the METAL PLAQUE and the WORMS. Use
the KNIFE on the bush to the right to obtain ACACIA THORNS.
* KNIFE + DRIFTWOOD = KNIFE WITH HANDLE, that you can use to cut the
CURVED THORNS right above where you found the plaque (a small branch
overhead). Go to the fireplace and use ACACIA THORNS on the fire to
curve them. Now do this: CURVED ACACIA THORNS + WORMS + WOOD + ROPE =
FISHING ROD. You can use the CURVED THORNS instead, it's the same.
* The metal plaque carries the inscription "NAUTILUS 1860", and that
should tell you what lies ahead. For now, though, combine it with the
FLINT to get a LIGHTER without having to occupy the ever-useful knife.
* Return to the oyster pond and use the FISHING ROD on the water to get
FISH. Go back to the fire and use the FISH on the FIRE. Mina might be
be back to full strength by now; it depends on how much you already
ate. In that case, no need to eat fish, but do it to gain points.
* Go up the slope, ignoring those weird steel thingies... even though
they do tell you, beyond any reasonable doubt now, that this isle has
been inhabited. Pick up the FORKED BRANCH, the AMADOU (combustible
mushroom), and use your KNIFE on the vines to get a THIN VINE (duh).
Use the wooden logs above your head to access the inland!
V.2 "THE INLAND"
* Here we go with some serious exploring now, and toward the game's best
parts. First off, pick up the YOUNG PALM TREE in front of you. Move
ahead to a crossroads, and use the KNIFE on the bush to get HIBISCUS
FIBERS. Combine the KNIFE with the YOUNG PALM TREE to strip it off its
branches. You get an INCOMPLETE BOW: combine with it the HIBISCUS
FIBERS to get a BOW.
* If you follow the poles and wires (definitely inhabited...) you'll get
to a dead end (for now): the rope bridge is destroyed. Look around, and
near the mouse you see a plant. Use the KNIFE on it to get a NARCOTIC
PLANT.
* Now turn around and head towards the steam you see rising from the
ground. It's not chimney smoke, but rather a sulphurous pond. There's a
snake: trap it with your FORKED BRANCH, and as it struggles, use the
KNIFE on the tree cortex to get RUBBER. Use the KNIFE on the bush to
get MEDICINAL HERBS too. Remove the branch to free the snake and go
back to the crossroads where the hibiscus was.
* Move ahead toward the wheat fields you see in the distance. You hear
a blood-freezing, animal scream. Hmm. Nothing to do here now.
* Move towards the pinewood on your right, opposite the red tree. Pick
up the three PINE KERNELS from the ground and the BRICK MOULD from the
stairs. There's also a vine, but Mina won't cut it yet because she
wants it longer. You can't use the stairs to get to the windmill
because they are broken. Obviously you need bricks.
* Go back one screen and cross the wheatfield. A scarecrow hangs from a
tree. Collect the DIRTY CLOTHS from it, and also pick up two LEMONS and
two ORANGES. One road is blocked by monkeys throwing stones at you (the
brats!). There's a wheat plant there, so use the KNIFE on it to get
some STRAWS and some WHEAT GRAINS.
* (OPTIONAL) You can combine FORKED BRANCH + RUBBER = SLINGSHOT, that you
can use to shoot rubber balls at the monkeys with. As you hit them, the
green bar on the screen will lower, and when it's empty the mokeys flee
and let you pass. It's quite hard to do this, but it earns you 10 bonus
points so you might want to give it a try. [thanks to MaGtRo]
* Across from where the monkeys are, there' a pond. Observe the scary
"big cat" footsteps, then collect the many goodies in this screen: some
CLAY from the shoreline; 2 LARGE BAMBOO PIECES; a MEDIUM BAMBOO PIECE
SMALL BAMBOO SHOTS; WICKERS; ELDERBERRY PITH (cotton sticks); some
WILLOW BARK. You must use the KNIFE on some of these to collect them.
Go back to the scarecrow and back across the wheatfield.
* Move towards the maple tree, the one with the red leaves. You can cut
it, but you can't take its nectar yet: you need a container. For now,
proceed further down and you'll get to a lake.
* Click on the water to make Mina drink, and then again to have her take a
bath. They both give you bonus points. Then use all of the four CLOTHS
on the water to get CLEAN CLOTHS. On the right of the lake, behind some
vines, you see a brick wall that would be clickable... but nothing you
can do about it now, so go back.
* Use the CLAY on the BRICK MOULD to get UNFIRED BRICKS. You need to cook
them, so go back to the fireplace on the shore (get used to it, because
there will be a few long trips) and use the UNFIRED BRICKS on the FIRE
to obtain two sets of BRICKS. Go back and use one set of BRICKS on the
stairs to repair them. You can reach the windmill now.
* Pick up the PICKAXE from the floor and the STRONG CLOTH from the trunk.
The trunk opens, and inside there's COPPER COINS and a hint that tells
you where to find silver coins (that you already have). Pick up GRAPES
from the vine, and also the WOODEN FORK and the METAL FORK. You can try
to repair the windmill, but that pesky monkey is blocking it.
* (OPTIONAL) It's optional WHEN to do it, but you must do it, and this is
a good moment. Also, it gives you points and a whole lot of hints if
you do this now. Combine the GOLDEN COINS, the COPPER COINS, a LEMON,
the MEDIUM BAMBOO PIECE, and a CLEAN CLOTH. All these items together
make a rudimental VOLTA BATTERY. You can recharge your phone now, and
receive news and phone calls, but can't call anyone. Must be something
blocking outgoing communications. The best thing about having your cell
phone back is that it includes an encyclopaedia: you can now obtain
very useful information about every single item by selecting them from
your Inventory. This helps a lot with making combinations.
* Walk down the road to reach the stone-throwing monkeys and shoo them
away (if you hadn't done so before with the slingshot). From near the
broken chimney, pick up the LOGS. Use the BRICKS on the chimney to
repair it, and then make a fire (i.e. LENS + AMADOU + LOGS, or
DRIFTWOOD + LIGHTER + AMADOU...) and use it on the chimney. Use one of
your CLEAN CLOTHS on the fire to make a BURNT CLOTH: it's combustible
and you might need it later.
* The bellows is broken. Leave it alone for now. Walk inside the small
"hut" instead, and find a cute little monkey......
V.3 "A Monkey Named Jep"
* Okay, so Mina names him Jep. The poor thing is weak and wounded. Use
a CLEAN CLOTH on him to bandage him. Combine the THIN VINE with STRAW
to make a MATTRESS, and use it on him. He's healing but can't eat yet.
You have medicinal herbs to combine with water, but can't collect any
without a container, so you'll need to make some pottery.
* Go back to the pond to get more CLAY, and use it on the wooden roating
plates in Jep's hut to get UNFIRED POTTERY. You can't cook it on the
fire, though, because it isn't hot enough. You definitely need the
bellows now.
* The bellows has a hole in the sealskin cover. To repair it, you need
skin from a seal. Duh. So go back to the shore, where you conveniently
find a dead seal. Use the KNIFE on it to get SEAL SKIN, SEAL FAT, and
some TENDONS. You can use the tendons to make a fishing rod in place of
the thin vine or the coconut fibers, but it's not really useful.
* Go back to the bellows, and use the SEAL SKIN on the BELLOWS to repair
it. Pump it once. Now cook the UNFIRED POTTERY in the fire and you have
POTTERY. From now on you have unlimited pottery: you shan't need to
make it every other minute, which is very convenient.
* Go down to the lake. On your way there, collect some MAPLE SYRUP from
the red maple tree with your new pottery. You'll get two bowls. At the
lake, click on the WATER to collect it. Combine the MEDICINAL HERBS
with WATER to have a REMEDY. Get some more WATER and combine it with
WILLOW BARK to have more REMEDY. Get even more water in another pot.
* Remember that brick wall beside the lake? Now you can use the PICKAXE
on it to make a hole in the wall and reveal a passage, but it's too
dark and Mina won't go there yet. Good to know, though.
* Go back to Jep. Use both REMEDIES on the fire to boil them, and once
they are boiled, you can use them on him. He'll heal for good and he
can eat now! Give him coconut, grapes, orange, pine kernel, or lemon,
BUT KEEP AT LEAST TWO FRUITS!! (plus a lemon, if you haven't done the
battery yet).
* You and Jep fall asleep, and you wake up to visions of Captain Nemo
asking that you give his body proper burial... hmm...
* You can use Jep to reach high places, and he can even hold some tools
and perform basic tasks. Go back inside the hut, and look up: there's a
nest. Use Jep on it to get another EGG. Go back to the windmill now.
Combine Jep with a FRUIT and use him on the other monkey to give it.
The monkey will let go of the windmill it was blocking.
* Use the STRONG CLOTH on the windmill to repair it, then go inside.
Combine Jep with the SEAL FAT and use him on the top of the windmill
to grease it. Now it works. Use the WHEAT GRAINS on the container in
front of you to make FLOUR.
* FLOUR + WATER + MAPLE SYRUP + EGG + any FRUIT = READY-TO-BAKE CAKE, and
you can use it on a fireplace to have a CAKE. It's not essential, but
you might need it later on. Better off, you can use sugar instead of
syrup. To make SUGAR, use one bowl of the MAPLE SYRUP on the FIRE, and
keep the other, for you'll need it. Using sugar or syrup for the cake
is the same, but sugar is better because boiling the syrup first gives
you one extra bonus point.
* From the windmill, go down the stairs you repaired earleir. Combine Jep
and the KNIFE and use him on the high vine overhead. Mina will make two
ROPE LADDERS with it. Go back to the destroyed rope bridge. Combine Jep
with a ROPE LADDER and use him on one of the poles. He'll be the
smartest monkey *ever* and build you a rope bridge!
* Cross the bridge, and you find an aggressive monkey. You can't attack,
so use a BAMBOO ROD on the sulphur pond. BOOM! It explodes, and the
monkey runs off scared. Alternatively, select the CAKE and use it on
the monkey. It'll eat it and fall asleep! Look around and pick up a
BROKEN CAGE, some SULPHUR, and COAL. Move forward to the burned land
outskirts and collect POTASH and IRON SULPHATE. Nothing else to do
here, so go back across the rope bridge.
V.4 "ON THE TRAIL OF CAPTAIN NEMO"
* Go back to the beach, and the ledge where you saw Captain Nemo's
ghost appear at the very beginning of the game. Use Jep on the nest
you couldn't reach before: you'll get no eggs because he drops them,
but you get FEATHERS instead. Combine Jep with a ROPE LADDER and use
him on the highest ledge. He'll secure it so you can climb.
* The cave looking on the beach is the "Granite House". It's important.
Look around attentively, read and collect everything, because here's
where the game changes its pace and genre, and becomes terrific.
* In the first room, turn around to face the entrance and pick up the
EGG from the nest. Then grab the MYSTERIOUS KEY, the DIVING SUIT and
the MUSICAL SCORE from aside Captain Nemo's body. Remember, he asked
that you give him burial. You can't go to left and front because it's
too dark, so proceed to the right.
* Pick up the PLANKS, the IRON FILINGS, the HAMMER, the NAILS, the
SCREWDRIVER, and a ROLL OF WIRE. Open the trunk and get two sailor
SHIRTS and some WICKS. Use the KNIFE on one SHIRT to get two fresh
cotton CLOTHS. Ignore the cannon and the cannonballs for now, but
grab the barrel of HARDENED GUNPOWDER.
* (OPTIONAL) You can combine SEAL FAT and a WICK to make an OIL LAMP and
light your way in the darkness. I suggest you do the lamp to earn the
extra points, but that you don't use it yet. The game is more linear
if you access the dark area later on.
* On the table there are PHOTOS, and RODS AND TUBE. If you read one of
the torn pages on the table, you'll see those elements can be used to
make a Becquerel battery (an energy generator), but you lack some of
the ingredients yet. There also instructions to make a Volta battery,
that you might already have done (lemon, copper, silver, bamboo, and
cloth). If not, do so right away, and it'll recharge your phone.
* Move to the adjacent room and pick up CHARCOAL and a STEEL CHAIN. Get
the COIL, the HEATER and the BOILER TANK. Combine them all and you
have a STILL, that you must put on the plate over the fireplace. Pick
up the AMADOU too, and use it to light a FIRE in the fireplace like
you have done before. Several compounds go into the still. MAPLE
SYRUP + STILL = ALCOHOL, and IRON SULPHATE + STILL = SULPHURIC ACID.
* Go back to Captain Nemo's body. Combine the PLANKS, the HAMMER and the
NAILS to make him a COFFIN. Use the COFFIN on the BODY, then use the
puller on the COFFIN. After the cutscene, Captain Nemo's ghost points
you go to the oyster pond under the archway to find a GIANT OYSTER.
Open it on one of the fires: it has a big PEARL in it. You might have
got to the giant oyster by yourself earlier in the game, by extensive
pixel-hunting, and if you did so, you shan't see this cutscene now.
* Go back to the "Granite Cave"... but most of the times you can't climb
up, because a bratty monkey disrupts the rope ladder! Remember what you
read about how those men created a backroute into the cave? That's what
you'll use. You've seen it already, by the lake uphill: it's that dark
tunnel behind the brick wall that was too dark for Mina to get in. So,
let's make us some light.
* Go to the chimney near the windmill. Take the dry SEAWEED and burn it
to produce SODA. Now combine SODA with SEAL FAT to make GLYCERIN. You
also get some SOAP. Go grab some more WATER from the lake. While you're
there, combine Jep with the SOAP to give the cute little monkey a bath,
which earns you bonus points. Go back to the chimney and use the WATER
on the fire to boil it, then combine BOILING WATER with GLYCERIN and
you have CANDLE WAX. Combine this with a WICK to have a CANDLE.
* (OPTIONAL) Go back to where the snake was, and again use the FORKED
BRANCH on it to trap it. While he's trapped, combine the BROKEN CAGE
with the WICKERS you have to make a CAGE, and then use the CAGE on the
snake to capture it.
* Down to the pond again, where you get some CLAY to use with the BRICK
MOULD you got in the "Granite House" to get one extra point. Collect
some more CLAY for your Becquerel battery. And if you want, you can
use the HARDENED GUNPOWDER on the windmill to make GUNPOWDER.
* Back to the lake again. Use either the CANDLE or the OIL LAMP on the
dark passage to be able to access it. Finally! Go down the passage...
but there's another aggressive monkey. You can get rid of it 3 ways:
1) use CAKE on it to make it eat and fall asleep
or 3) use the ALCOHOL on it to make it drink and fall asleep
or 3) use the CAGED SNAKE on it to scare it away.
You'll get the same amount of bonus points either way. Pick up the GUN
and the NON-WORKING LANTERN from the ground, and proceed forward.
* Finally back into the "Granite Cave"! Go right, you hear some scary
noises from the hole in the ground. Pick up the BROKEN PROJECTOR from
the table, another NON-WORKING LANTERN, SULPHUR and a small amount of
highly-concentrated SULPHURIC ACID. Go down the hole and pick up the
AIR TANK and the HELMET. Collect SALTPETER from the wall behind you.
* Back to the room with the STILL. Revive the fire by just looking at it.
Combine SULPHURIC ACID and SALTPETER, and use what you get on the STILL
to produce NITRIC ACID. Now you have all the ingredients for the second
battery: NITRIC ACID + RODS + CLAY + POTASH = BECQUEREL BATTERY.
* Go back to where the hole in the ground is. Combine either the VOLTA
BATTERY or the BECQUEREL BATTERY with both of the NON-WORKING LATERNS
you have, so they'll be charged. Then combine the LENS with the BROKEN
PROJECTOR, a LANTERN, and the PHOTOS. Place the repaired PROJECTOR on
the stool and watch the slides. They're pretty cool and useful.
* Go down the hole in the ground and collect some more SALTPETER. Combine
the AIR TANK, the HELMET, the other LANTERN, and the DIVING SUIT to have
a fully working diving suit. Try a dive now... but argh! A shark comes
out and nearly chops Mina's head off, so she retreats quickly.
* You have some more SULPHURIC ACID, so combine it with SALTPETER to get
more NITRIC ACID. Combine this with GLYCERIN and you have NITROGLYCERIN,
which, as we all know, is a very powerful explosive. You need it later.
* Go back down the hole. Grab some more SALTPETER, combine it with SULPHUR
and CHARCOAL to make even more GUNPOWDER. Grab even more SALTPETER even
if you don't need it, since it gives you one bonus point.
* Let's arm Mina now. Combining the FORKED BRANCH and the RUBBER, you
can have a SLINGSHOT (if you didn't have that already). Combining the
GUN, the GUNPOWDER and the IRON FILINGS, you can have a LOADED GUN.
Combining the PORCUPINE QUILLS, the WICKERS and the FEATHERS you have
ARROWS, to combine with the BOW that you already have from the inland
(incomplete bow + hibiscus fibers). Now you have BOW WITH ARROWS.
* Additionally, if you combine SULPHURIC ACID, NITRIC ACID and any kind
of cotton (it can be the ELDERBERRY PITH, or any clean CLOTH), you'll
have some PYROXYLIN, commonly known as GUNCOTTON or COTTON GUNPOWDER.
You can load either the gun or the cannon with it.
* Now you have two ways to get rid of the shark:
1) PORCUPINE + NARCOTIC PLANTS = LACED PORCUPINE,
and use it on the water: the shark will be knocked out
or 2) use the GUN on the water to lure the shark out,
and then just shoot it.
Neither of them gives you extra points, so just choose any.
V.5 "THE NAUTILUS"
* Get into the water. Mina will swim and surface near the Nautilus! Wow!
Actually it is the "NAUTILUS 1860", its construction date. Keep this
number in mind. Climb up the stairs to the top, but sentry robots come
hovering around you! Mina retreats fast. Once safe, jump back into the
water to reach the Nautilus again, then look up: time your climbing so
that you come up right behind the robot, and shoot it down to destroy
it. Gotcha! You can use the GUN or the BOW, but I haven't been able to
destroy robots with the BOW yet. In any event, aim at the bright green
thruster that they use to move.
* There's a control panel on top of the Nautilus bridge, that you cannot
access without a Mysterious Key... you have one, but as you can read,
its crystals are deplenished. You need to find four new crystals.
* Go back out through the backroute. There's a second robot near the
lake. Shoot it quick! When it's destroyed, get closer and pick up its
DAMAGED KEY and THRUSTER.
* Go to the windmill. On your way there there's a third robot. Shoot it!
Another hit, another DAMAGED KEY, and another THRUSTER.
* Now you may go to where the rope bridge is and repeat the whole thing
with the fourth robot, but there's a muuuuch better way. First, combine
a sailor's SHIRT with the ROLL OF WIRE and the SMALL BAMBOO SHOTS.
That way, you've got a KITE. You read it can be used to reproduce
Franklin's experiment and catch a lighting. Just what we need!
* Combine the KITE with Jep, and use the monkey on the pole that is at
the start of the wheatfield, facing the red maple tree. It's the only
clickable pole left. Do it NOW, or you won't be able to, later on.
The lighting will energise the electric wire, destroy the robot that
is touching it, and give you bonus points. Go to the rope bridge, and
pick up another DAMAGED KEY and another THRUSTER.
* A fifth robot is in the pinewoods, so don't go there. Go to for the
windmill via the chimney instead, and shoot the robot from behind. Go
down the stairs to collect another DAMAGED KEY and another THRUSTER.
* Now you already have the four keys you need, but there's more robots
to destroy. Go back to the beach, but laser beams block you access.
There's a control box but it's too high to reach. So either you make
some DYNAMITE (which is NITROGLYCERIN + WICK + CLAY) and use it on the
box, or you combine Jep with the SCREWDRIVER and use him on the box. If
you choose the former, the box will blow up and you can pass. If you
choose the latter, you'll need to solve a puzzle. I strongly recommend
the puzzle, for it gives you five bonus points more...
* (OPTIONAL) ... and to get even more points, do this first: combine the
STEEL CHAIN with the METAL FORK to make a LIGHTNING ARRESTER. Use this
on the laser beam, and you shall pass unharmed. Now turn around, open
the box, and solve the puzzle. Two birds with one stone.
* To solve the puzzle inside the control box, follow this pattern:
Buttons in the upper row must head DOWN, LEFT, RIGHT, LEFT, RIGHT.
Buttons in the side row must head UP, LEFT, RIGHT, UP, LEFT.
* Lasers are off. Go down to the beach. This robot, number 6, is broken.
Mina will try to deactivate it. Use it to open a new control panel. New
puzzle. Four letters, to be matched with four cyphers. You'll notice
soon that there's only letters appearing in the word "NAUTILUS".
So, number them: N=1 A=2 U=3 T=4 I=5 L=6 U=7 S=8
* Since the "U" is both at positions 3 and 7, both cyphers will do. Also,
there could be letters that don't belong to the word "NAUTILUS", and in
that case, you assign a "0" to them. So, "UUAS" corresponds to "7718",
or "3318", and TUSS = 4388; LNAI = 6125; LNAX = 6120; and so on.
Letters are generated randomly on each retry. Once deactivated the
robot, grab its DAMAGED KEY and the THRUSTER.
* If you try moving further down the beach, you'll see another sentry
robot blocking the way. You must get back to the "Granite House" via
the backroute. Do so, and go where the cannon is, in the second cave.
* There goes the seventh robot, hovering across the beach. You see it
through a window. Destroying it is optional, but it gives you ten bonus
points, so go for it. Pick up a CANNONBALL. Use the bottom part of the
cannon to open a tray. Use the CANNONBALL on it, and then GUNPOWDER or
GUNCOTTON to load it. Now click on the wick and nail down the robot.
* Go back to the cave entrance, and use the ROPE LADDER on the large
vine. Go down to the beach and you find another THRUSTER by the seventh
destroyed robot "carcass", but no key.
* There is an eigth robot, too. From where you are now, move towards the
archway in the cliff and the oyster pond. The robot is flying around.
To nail it down is hard because it moves fast, so just keep trying if
you die. Collect the KEY and THRUSTER. Then go further ahead to the
palms, where the crabs were at the start of the game. Use Jep on the
COCONUT high up on the palms. It'll fall down. Pick it up. Now combine
it with the knife to open it like you've done before, but instead of
using the knife again to have edible cocnut, combine the COCONUT with
the SANDSTONE. The fruit will be smashed and lost, but you for some
reason you have one bonus point. In total, this little extra trip has
won you seven, so it was well worth making.
* Now. Combine the MYSTERIOUS KEY you have with the SCREWDRIVER in order
to pry out the deplenished crystals. That way, you have an EMPTY KEY.
Combine each DAMAGED KEY with the SCREWDRIVER to get working CRYSTALS.
You should have six, which is two more than you need. Finally, combine
the four working CRYSTALS with the EMPTY KEY, to have a WORKING KEY.
* You are about to leave the beach and the inland for good, so you may
want to replenish yourself of CLAY and WATER. You may need the clay
later, but the water is just so you earn one bonus point.
* Go back to the "Nautilus", and use the WORKING KEY on the control panel
to gain access. Another puzzle. If you try random combinations, you'll
see how the cyphers you need to enter are a modification of those given
according to a matrix. What does that mean? In the previous puzzle, the
solution was in the name NAUTILUS; in this one, it's the number "1860".
* In short, add "1" to the first given cypher to get the first resulting
cypher. Add "8" to the second, "6" to the third and leave the fourth
unaltered. It follows the equation y=x+1 y=x+8 y=x+6 y=x+0 where
"y" are the cyphers you need to enter. So 7143 would result in 8943;
1225 would be 2085; and 0000 is 1860 of course :)
Even more simply, follow this scheme written by RunawayGroom, that I
took from his walkthrough and slightly modified:
[x+1] [x+8] [x+6] [x+0]
0=1 | 0=8 | 0=6 | 0=0
1=2 | 1=9 | 1=7 | 1=1
2=3 | 2=0 | 2=8 | 2=2
3=4 | 3=1 | 3=9 | 3=3
4=5 | 4=2 | 4=0 | 4=4
--etc-- | --etc-- | --etc-- | --etc--
* Go downstairs to enter the Nautilus. Metal bars block the way. There's
a lever on the opposite wall. Combine Jep with a THRUSTER and use him
on the lever. It will raise the bars. Make your way to the collapsed
door on the other side of the room, and use two THRUSTERS on it to
raise it. Do not go down the stairs yet, though.
* Turn around, and you see that dishevelled metal plank lying on the
ground is now clickable! Click on it to make a bridge. You can step on
it and reach that door above the room.
* Yessir, it's another puzzle. It's not hard, it's just plain *devious*!
Fiddle around with the pieces until you have an "N" engraved in rusty
metal. It's not hard once you get a hold of it, it just takes time.
When you managed, you'll be presented with a hole leading down to a
cabin underneath. Should you jump? No. Instead, go back and this time
go down the stairs under the door raised by the thrusters. A puzzle!
* This is easy, though. The four cyphers to choose are obviously "1860".
The letters, well, for every screen choose the only one contained in
the word "NAUTILUS". For example, if you see "XYKD QSFG", you must
choose "S". There, it's solved. Enter Captain Nemo's personal cabin.
* Take a walk around the room. Under the sofa on the right there's a
pearl. Move the metal plank blocking the shelves and place the pearl
on the wine-red case on the shelf facing the door. Captain Nemo's safe
is on the far left corner. To open it, you must rotate the squares to
get a big "N" in the centre.
* This one robot isn't working very well either. Its sensors are broken
and it isn't sure whether you are Captain Nemo or not. So, you'll have
to prove you are him... hehe. You can do so by either answering a few
questions, or by solving a complicated musical puzzle.
1) THE QUESTIONS. Click on the robot. It will say a riddle, and to
give an answer you must indicate an item anywhere in the room, by
clicking on it. That'll be your answer.
Here's some of the most common Q/A:
THE RIDDLE SAYS... THE ITEM TO CHOOSE IS...
a lifesaving animal... dolphin
brightest pearl... pearl found under the sofa
correspondence... pile of letters (in the safe)
creature that only drinks water... sponge
creatures adorning the wall... swordfish
four wings.. dragonfly
follows the sun... sextant
graceful as its big brother... seahorse
its silvery substance... mercury barometer
ivory daggers... shark teeth
measures distance and time both... chronometer
misty clouds... storm glass
Nemo's most treasured belonging family portrat (in the safe)
the respected master... Aristotle's "Poetics"
the Spaniards stole it... aztec scepter
twinklings stars... starfish
* To answer the question asking which weapon is the oldest, you combine
Jep with CLAY and use him on the plaques right behind the robot, to
find out that the oldest weapon is the club. This also gives you a
bonus point. (OPTIONAL) If you want to score as much as possible in
the game, go back out and alllllllllll the way back to the inland to
get even more clay.
* Save your game often as you are answering the questions. Once you
answer correctly to seven, without making more than two mistakes, the
robot will trust that you're Captain Nemo.
2) THE MUSICAL PUZZLE. You only apparently need to know how to read
music in order to solve this. It *does* help, but it's not necessary.
First thing, use the MUSICAL SCORE on the light wooden stand right
above the piano keyboard. It'll fit. Now use the blue lever, and the
organ will play a tune. You can hear it is made of three ladders only
slightly different from each other, plus a finale. You'll also notice
it's the music you've been hearing as a soundtrack since you entered
Captain Nemo's cabin. But anyway, the point is to be able to play the
tune so that the robot convinces you are Captain Nemo. I figured out
the exact notes, and played them, but still couldn't solve the puzzle.
A similar walkthrough written by MaGtRo, with Mordack's help, reveals
the one detail I couldn't get to, and now it works. Yay!
* Here are the piano keys, numbered left-to-right:
1 3 6 8 10 13 15
2 4 5 7 9 11 12 14 16
For an even more visual reference, visit:
http://www.geocities.com/haley_brimley2/organ.jpg
The keys must be pressed in this sequence:
9, 11, 7, 4, 11 (first ladder)
9, 11, 7, 3, 11 (second ladder)
9, 11, 7, 1, 11 (third ladder)
10, 15, 6, 10, 1, 3 (finale)
It only takes a little practice and patience. The reason why the
finale must be played on the black keys only is... well, complex.
http://www.gameboomers.com/wtcheats/pcRr/ReturnMysteriousIsland.htm
Everything is explained there. Way to go, Mordack!
* If you solve either puzzle (the quiz show, or the musical one), the
robot will be convinced you are Captain Nemo and follow your orders
to lower the shield surrounding the island and blocking all outgoing
communication. It's over! Mina can call her mother, and have a rescue
team sent to the island to pick her (and Jep) up.
* Congratulations, you cracked "RETURN TO MYSTERIOUS ISLAND".
With some help. ;-)
<‾‾‾|‾‾‾|‾‾‾>
{VI} AFTERWORD
6.1 "Unsolved puzzles"
Not all that glitters is gold. I couldn't solve a couple of things in
this game, and no one else has, to my knowledge at least.
In one of the slides it says that they used the Becquerel battery to
power their telegraph. Okay. There *is* a telegraph plate in the same
room as the cannon at the "Granite House", but it cannot be clicked. If
you follow the telegraph line outside (following the wire and the poles)
you get to the farmhouse at the foot of the volcano, where, once again,
nothing is clickable. Is there some other use to the Becquerel battery,
or is it just supposed to be an alternative to the Volta battery? Hmm.
Also, someone on the boards at GameFAQs.com says that it's possible to
"make rum". I personally didn't find a way to, but it's likely it has
something to do with alcohol and maple syrup. All you get in the game is
*two* bowls of syrup only: you use one to make alcohol and the other one
to make sugar and/or the cake. But I guess that if you avoid making the
cake (which, as we know, it's useless if you have the snake) you can use
that pot of maple syrup to do rum instead. Not sure yet.
6.2 "In general"
There are several ways to play this game. The one described above is
probably the simplest and more straightforward, but not the only one.
The replay value is high, in my opinion.
Some things you can avoid doing at all, like baking a cake or trapping
the snake. In general, the windmill is completely useless, since you only
use it to make flour (no cake = no flour needed) and to make gunpowder,
that you can get in two other ways.
However, if you wound/kill the shark and the robots with alternative
weapons (i.e. the bow or dynamite), you might get extra points.
I finished the game with a bonus score of 269 on first play and 304 the
second time around. The third time around, also using tips from MaGtRo's
walkthrough, I scored 337. It appears that the maximum possible score is
361, but I couldn't get there yet. Since you get bonus points by making
new combinations and making up creative solutions, you always have new
ways of earning those. Make sure you combine Jep with every possible item
he can hold, and to make all possible combinations in general!
<‾‾‾|‾‾‾|‾‾‾>
{VI} ACKNOWLEDGEMENTS
Thanks to "The Adventure Company", who always supplies top class graphic
adventures. Even if they get relatively low scores on most specialised
magazines, it's these guys to keep this great genre alive in these times
of first-person-shooters, and I'm happy they do.
At first I hadn't been able to get the windmill to work, and also, I
could not crack the puzzle to deactivate the robot on the beach. For
both challenges, I referred to RunawayGroom's walkthrough. Thanks!
Thanks to Leah, for support and testing. I love you! :)
Thanks to GameFAQs for hosting this FAQ/Walkthrough.
Okay, that's all. ;)
‾*‾*‾*‾*‾*‾*‾*‾*‾*‾*‾ END OF FILE ‾*‾*‾*‾*‾*‾*‾*‾*‾*‾*‾