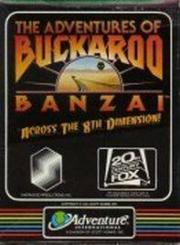
THE ADVENTURES OF BUCKAROO BANZAI (#14)
Written by Scott Adams, Phillip Case and Kem McNair (1985)
Walk Through by Dorothy Millard (C64 Sagaplus Version)
Scenario
Based on the 20th Century Fox movie "The Adventures of Buckaroo
Banzai Across the eighth Dimension." Buckaroo Banzai, a
neurosurgeon, rock star and more, must try to fix a jet car that
can drive him into the Eighth Dimension.
Notes
1. There is a "bug" to do with light. If it is light but
actions wont work, turn on the flashlight. It is dark when it
should be light and visa versa in three locations.
(a) In Yoyodyne office when you GO STAIRS, even with your
flashlight on it is still dark, but you can still continue as if
it were light.
(b) After driving inside the mountain when you GET OUT of the car
it is now light instead of dark but nothing works unless you
use the flashlight, then when you go NORTH it is dark even with
the flashlight on.
2. I was unable to transmit the codes at the end to complete the
game.
Walk Through
(Start in Yoyodyne office), LOOK UNDER TABLE (see a safe mounted
in the floor), W, E, E (cul-de-sac), ENTER HOUSE (garage), GET
TOOLBOX, EXAMINE TOOLBOX (a sticker on the lid reads "Sams
Service Station"), S, W, W (corner of Main Street and Hickory
Avenue), ENTER GAS STATION, DROP TOOLBOX, ENTER CASHIERS BOOTH,
EXAMINE TRASH (see something), GET BATTERY, EXAMINE BATTERY (no
water in it), N, E, N, N, W (west end of parking lot), ENTER CAR
(to cockpit of jet car), EXAMINE DASHBOARD (fuel gauge reads
empty), EXAMINE COMPARTMENT (find something), INVENTORY (now have
a formula and a jar of glowing fluid), READ FORMULA (special jet
fuel is made from gasoline, sand, bauxite and a special
catalyst), GET OUT (of car), DROP FORMULA.
N (beach), GET SAND, ENTER SHACK (lifeguards), GET RADIO, EXAMINE
RADIO (see transmit switch but theres no battery or antenna and
its not working), E, N (cold shallow lake), FILL BATTERY (with
water), E, S, W, DROP BATTERY, E, S, S, W (middle of Hickory
Street), ENTER SHED (radio), DROP RADIO, CONNECT ANTENNA TO RADIO,
N, E, ENTER YOYODYNE (office), DROP SAND, DROP JAR, W, N, ENTER
STORE (hardware), GET PICK-AX, GET PUMP, EXAMINE PUMP (a manual
hand pump with a hose 6 ft. long), GET CABLE (jumper), E, S, S, E
(pasture), DIG (using pick-ax - you dig a hole), EXAMINE HOLE (see
an underground phone line), CUT LINE, GET LINE (it is still
attached), DIG (again), CUT LINE, GET LINE (this time you
succeed), W, N.
N, N, N (foot of mountain), EXAMINE MOUNTAIN (see a ledge 15 ft.
up with a small peak), THROW LINE, DROP PUMP, DROP CABLE, TIE LINE
TO PICK, CLIMB LINE (small mountain ledge), PULL LINE (now have
the pick), GET BAUXITE (using pick), D (foot of mountain), DROP
PICK, DROP LINE, GET PUMP, GET CABLE.
S, W (west end of parking lot), GET BATTERY, CONNECT CABLE TO
BATTERY, DROP BATTERY, DROP CABLE, EXAMINE CAR (see power
terminals, fuel tank and a jet engine connected by a hose), GET
HOSE, E, S, S, ENTER STATION (gas), OPEN TOOLBOX (find something),
INVENTORY (now have a key, roll of duct tape and a flashlight),
UNLOCK FILLER PIPE, DROP KEY, TAPE HOSE TO HAND PUMP, DROP TAPE,
E, ENTER YOYODYNE (office), GET SAND, GET JAR, TURN ON FLASHLIGHT,
GO STAIRS (due to a "bug" even with your flashlight on it is still
dark but continue anyway), DROP BAUXITE, DROP JAR, DROP SAND,
EXAMINE STAIRS (find something), INVENTORY (you have an empty
chemical jug), GO STAIRS, TURN OFF FLASHLIGHT, W, ENTER STATION
(gas), PUT HOSE (it reaches deep enough to get the gasoline), PUMP
GAS INTO JUG (using hand pump), DISCONNECT HOSE, DROP HAND PUMP.
E, N, N, W (west end of parking lot), GET FORMULA, DROP HOSE, E,
S, S, ENTER YOYODYNE, GO STAIRS, DROP JUG, TURN ON FLASHLIGHT
(dark but dont worry), MAKE FUEL, TURN OFF FLASHLIGHT, DROP
FORMULA, GO STAIRS, W, N, N, W (west end of parking lot), CONNECT
CABLES TO TERMINALS, REFUEL CAR, DROP JUG, GET HOSE, N, N (shallow
lake), WASH HOSE, S, S, REPLACE HOSE (must have been washed
first), ENTER CAR, EXAMINE DASHBOARD (fuel gauge now reads full),
PRESS BUTTON (engine is idling), GET OUT, GET BATTERY, ENTER CAR,
CLOSE COCKPIT, PRESS BUTTON (you drive to Main Street), PRESS
BUTTON (you drive inside the mountain), OPEN COCKPIT, GET OUT (it
is now light instead of dark but nothing works unless you use the
flashlight), TURN ON FLASHLIGHT, EXAMINE CANISTER (see a light
marked "RFI shield" is on, a switch and an envelope), PRESS SWITCH
(something happened), EXAMINE CANISTER (RFI shield is now off),
GET ENVELOPE, N (now it is dark even with the flashlight on), OPEN
DOOR (you go through and it closes behind you), TURN OFF
FLASHLIGHT, DROP FLASHLIGHT.
(You are behind the mountain), W (Corner of Main and Mountain
View), N, W (back to west end of parking lot), GET CABLE (jumper),
E, S, S, ENTER YOYODYNE, OPEN ENVELOPE (something here), INVENTORY
(you now have a key), DROP ENVELOPE, OPEN SAFE, INVENTORY (now
have a sheet of paper), W, W, ENTER SHED (radio), DROP BATTERY,
DROP CABLE, CONNECT BATTERY TO RADIO, READ PAPER (it is a
handwritten note which says "Disarm Code, 1 Warfin 2 Yoyodyne),
EXAMINE RADIO (there is a transmit switch), PRESS SWITCH, TRANSMIT
WARFIN, TRANSMIT YOYODYNE.
The Earth is safe, the adventure is over.


