============================
=== THE ELECTRONIC GAMER ===
============================
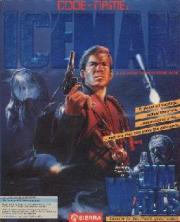
CODENAME: ICEMAN Walkthru
CODENAME: ICEMAN is Jim Walls's first effort outside his successful POLICE
QUEST series. Combining a submarine simulator with an adventure story, this
game (like many recent releases from Sierra) has a great deal of depth in
its puzzles and solutions. Many paths are provided to get the player from
the opening screen to the end of the game. Part of the game design is for
the player to be able to choose the "wrong" route (in terms of total
points) but still be able to complete the game. Alternate solutions will be
presented where appropriate.
This walkthru contains specific puzzle solutions and reveals the sequences
that I chose to complete the game. It is recommended that the walkthru be
used (preferably by someone not playing the game) to provide hints to the
game player when necessary; this makes the game more fun to play all the
way through, only using the walkthru when absolutely necessary. Commands
which should be typed into the game appear in the walkthru in capital
letters. I used both the mouse and the keyboard; joystick play might be
slightly different.
TAHITI
The story opens with Commander John B. Westland sunning himself on a
beautiful Tahitian beach, on leave from his duties with the U.S. Navy. LOOK
AROUND. LOOK TABLE. READ MAGAZINE. GET UP. Walk one screen to the left
where you will see a high-spirited volleyball game. LOOK AROUND. LOOK GIRL.
TALK GIRL. She asks if you would like to join the action. PLAY. At this
point, the game takes over and no player input is necessary -- just watch
your points increase! (It may be possible to earn more points by moving
around; I didn't do this.)
As the game progresses, the ball is hit into the ocean, and one of the
girls runs after it. She will yell for help. Enter the ocean and exit to
the bottom of the screen. You save the girl and swim back to the beach.
SHAKE AND SHOUT. CALL FOR HELP. LOOK LISTEN AND FEEL. GIVE 2 BREATHS. LOOK
LISTEN AND FEEL. CHECK PULSE. BEGIN COMPRESSIONS. At this point, the game
takes over again.
Walk one screen left, go up the beach, and exit at the top of the screen.
Walk to the nearest hut and onto the deck. Exit the screen to the left.
Enter the doorway. LOOK ROOM. Walk to nightstand. LOOK NIGHTSTAND. LOOK
DRAWER. OPEN DRAWER. TAKE CARD. TAKE MONEY. CLOSE DRAWER. Walk to the
closet. OPEN CLOSET. LOOK CLOSET. LOOK CLOTHES. LOOK LEFT POCKET. TAKE BOOK.
READ BOOK. Note the phone number for General Braxton (I never found Gigi
home). CLOSE CLOSET.
Since you are shirtless, you can exit right from the deck, and dive into
the water, or you can walk back to the hotel on the beach. I prefer to swim,
so exit the way you came in, and DIVE from the platform. You will
automatically be swimming. Swim one screen to the right, head toward the
top of the screen, and you'll be back on the same screen which began the
game. Walk over to your chair and WEAR SHIRT. Exit to the top of the screen
and walk to the hotel door. OPEN DOOR. Walk to the counter. LOOK WOMAN.
Walk to the sign between the plant and the counter. Be sure you are facing
the sign on the rear wall, as there are two signs in the bar. LOOK SIGN.
Note the number for the dinghy service. Walk to the door on the right. It
will open automatically. Walk to the dark-haired woman sitting at a table
by herself. LOOK WOMAN. TALK WOMAN. ASK NAME. BUY DRINK FOR STACY. DANCE.
Stacy will get up and you will automatically follow her to the dance floor.
(You can move around the dance floor with your arrow keys/mouse. It won't
earn you extra points, but it is fun to watch!) STOP.
Leave the dance floor and walk to the chair on the other side of Stacy's
table. Position yourself so you are behind the seat of the chair, facing
toward the bottom of the screen. SIT. TALK. Stacy asks, "Would you like to
come back to my place?" Answer YES. You will automatically get up and
follow her. Next, you find yourself with Stacy on her porch. KISS STACY.
You will then be invited to her room. Walk to the bed and SIT beside her.
TALK. She will tell you she has lost an earring. KISS STACY (repeat this
command five times). Since this game is not LEISURE SUIT LARRY III, you
will have to use your imagination for what happens next!
The next morning Stacy is gone. GET UP. Tap your up-arrow key to face the
rear table. LOOK TABLE. TAKE NOTE. READ NOTE. Walk to door. OPEN DOOR. When
you come down the steps from Stacy's bungalow, walk as close as possible to
the next hut, and walk to the left side of the screen. You will see
something glimmer in the sand. Could it be the elusive earring? Stop
immediately in front of the glimmer. LOOK SAND. LOOK GLIMMER. TAKE EARRING.
LOOK EARRING. OPEN EARRING. LOOK IN EARRING. TAKE MICROFILM.
Continue to walk to the left, then exit left again on the next screen. Walk
to the hotel doors. You will see a newspaper stand. Walk to it and BUY
PAPER. Move to the hotel doors and OPEN DOOR. Walk to the counter and TALK
WOMAN. GET MESSAGE. READ MESSAGE. Exit the hotel lobby, walk to the left,
and continue left past the volleyball net and the first set of huts. Exit
this screen toward the rear of second hut. You are now back at your hut.
Walk left on the first hut's deck and enter your room. Walk to the
nightstand and USE PHONE. The game will prompt you for a telephone number.
Enter 1-202-555-2729. When General Braxton answers, TALK MAN. USE PHONE.
Enter 555-6969. TALK MAN. This time you will have to walk back via the
beach, so leave the room and exit to the right on the next screen. Walk
down the beach past the first set of huts and exit right. Pass the
volleyball net and exit right again. When you reach the front of the hotel,
a dinghy will be waiting. Walk onto the dinghy, and the game will take it
from there.
PENTAGON
You will be flown back to Washington automatically and will be deposited at
the front door of Dulles Airport. Walk through the doors on the right and
LOOK AROUND. A limousine will pull up, the driver will approach you, and
ask if you are Commander Westland. SHOW ID. The driver will escort you to
the car door and take you to the Pentagon.
At the Pentagon you will exit the car automatically and walk through the
front doors of the building. Walk to the counter, TALK GUARD, and SHOW ID.
You can take either elevator to the briefing. When you are at the elevator
doors, PUSH BUTTON. Upon exiting the elevator, you will meet another guard.
SHOW ID. He will take your identification card. Walk to the door. Save your
game.
OPEN DOOR, walk to the chair, and SIT. The game takes over at this point,
and the briefing begins. Pay close attention to the instructions given in
the briefing. Both men will leave the room at the conclusion of the
briefing. GET UP. LOOK TABLE. TAKE ENVELOPE. LOOK ENVELOPE. Leave the room,
and once again approach the upstairs security guard. GET ID. LOOK ID. GIVE
ID. LOOK ID. Walk to the elevator and PUSH BUTTON.
When downstairs, exit the building at the bottom of the screen. You will
immediately be flown to Hawaii and be located outside the Honolulu Airport.
A car and driver are waiting. TALK DRIVER. He will ask if you are John
Westland. YES. SHOW ORDERS. He will take you to Pearl Harbor and the U.S.S.
BLACKHAWK.
U.S.S. BLACKHAWK
Walk up the gangplank to deck level and stop. SALUTE FLAG, SALUTE OFFICER,
REQUEST PERMISSION TO COME ABOARD. You are placed in your cabin aboard the
submarine. LOOK AROUND. LOOK DESK. LOOK COMPUTER. OPEN DRAWER. TAKE CALIPER.
LOOK CALIPER. CLOSE DRAWER. OPEN BOOKSHELF. LOOK BOOKSHELF. TAKE BOOK. READ
BOOK.
Write the code letters and number equivalents because you will need them
later in the story. CLOSE BOOKSHELF. Exit your cabin to the left. When you
leave your room, you will meet the ship's captain and begin your maiden
voyage. Save your game. The walkthru will now be subdivided into the
separate puzzles you'll encounter aboard the BLACKHAWK. All orders from the
captain will appear in quotation marks.
BLACKHAWK: FIRST RUN
When you leave your cabin, the captain will order you into the pilot's
chair. Have your game manual nearby; specific sections of the control panel
will be referred to by the numbers found on Page 8.
All lights red: Reverse
No lights: All stop
One light: Ahead slow
Two lights: Ahead 1/3
Three lights: Ahead 2/3
Four lights: All ahead full (speed)
Engine speed is measured by gauge numbers 8 and 9
"Ahead slow." Tap the plus key once.
"Right full rudder, set course for 180 degrees." Tap the right-arrow key as
many times as necessary to move the pilot wheel as far right as it will go.
Watch the display in #30 (Heading Indicator). When the readout says "180,"
tap the left-arrow key a few times to turn the pilot wheel to center once
again.
"Right full rudder. Change course to 270 degrees." Once again, turn the
wheel as far right as it will go with the right-arrow key. When #30 reaches
270, turn the wheel to center position with the left-arrow key.
"Hold her steady." Do nothing.
"Let's roll! All ahead 1/3." Tap the plus key one time. (You can watch #32
and learn to gauge speed.) The lights on the control panel indicate the
following conditions:
"Prepare for dive sequence; acknowledge green board." Look at #26. You will
see one red light, indicating that a hatch is open. CLOSE HATCH. GREEN
BOARD CONFIRMED.
"Dive! Dive! Dive! Rig planes for 10 degrees." Look at gauges #10 and #29.
To perform a shallow (or 10-degree) dive, tap the up-arrow key once.
"Dive to 200 feet. Acknowledge correct depth." Watch gauge #5. When this
gauge reads 200, tap the down-arrow key once, and respond with DEPTH
CONFIRMED.
"Change heading to 360 degrees." Use the right-arrow key to turn the pilot
wheel right until gauge #30 reaches 0. Use the left-arrow key to return the
pilot wheel to center.
"Maintain course and depth." Do nothing; wait for the next order.
"Steady as she goes." Do nothing.
"All ahead full." Tap the plus key two times until all four indicator
lights on gauge #32 are lit.
"Bring her left to 355 degrees." Turn the pilot wheel with the left-arrow
key, watching the readout on gauge #30 until it reads 355.
"Steady as she goes." Do nothing.
"Maintain current heading and speed." Do nothing.
"All stop." Tap the minus key four separate times; do not hold the key
down! As you watch the engine speed decrease, check gauge #32 to make sure
that all lights are now blue or off. GET UP and save your game.
BLACKHAWK: SECOND RUN
You automatically follow the captain into his cabin and sit on his couch
while he retrieves a briefcase from the safe. He then asks for your half of
the briefcase combination. Enter 134. LOOK BRIEFCASE. TAKE ENVELOPE. OPEN
ENVELOPE. LOOK CHART. READ ORDERS. The orders appear on-screen, and give
details of the next part of the voyage. Read these carefully, and jot down
important details.
Once the orders are read, the captain quickly gathers the papers and
briefcase, and puts them in the safe. GET COMBINATION. Note both the safe
and briefcase combinations. Pause the game here and plot a course using the
route indicated by the chart that was in the briefcase. The figures below
are for a route which is off by 250 nautical miles. With better course
plotting here, points can be increased.
Follow the instructions on Pages 6 and 7 of the game manual. Exit room
through the right door. Walk to the computerized chart table. LOOK MAP.
PLOT COURSE. I used the following coordinates:
WP 0: 30N x 170W (Waypoint 0 -- given); WP 1: 70N x 170W; WP 2: 84N x 74W;
WP 3: 83N x 7W; WP 4: 70N x 13W; WP 5: 65N x 23W.
EXIT to leave the chart table. You will automatically be put behind the
pilot's wheel for the second time. "Maintain current heading." Do nothing.
"All ahead 2/3." Tap the plus key three separate times, and look at #32
until three lights are lit, indicating 2/3 speed.
"Set depth for 300 feet." Tap the up-arrow key once, and read #5. When the
number 300 shows in the window, tap the down-arrow key once.
"Acknowledge when depth is attained." DEPTH CONFIRMED.
"Maintain course and depth." Do nothing. At this point, sonar will report
contact. Do nothing. There will be a number of reports and computerized
sonar scans with the final report.
"Friendly...French frigate." Do nothing.
"Come to periscope depth." Tap the down-arrow key once. When #5 reads 70,
tap the up-arrow key once. As you are coming to periscope depth, the
captain will order you to "reduce speed by 1/3." Tap the minus key once.
"All ahead slow." Tap minus key once again. As the ship reaches its slower
speed, you will be told there are coded messages waiting for you. GET UP
and save the game.
BLACKHAWK: DECODING MESSAGES
Walk to the man at the right side of the long console. LOOK MAN. TALK MAN.
He will hand you two messages: first, a message from the U.S. Navy with two
sets of three numbers each. These are the primary and secondary Washington
code keys. (Write these numbers on a piece of paper; they are different
each time the game is played.)
The second set of six numbers are CIA primary and secondary code keys.
Again, write these on a piece of paper. Walk to the captain's cabin. OPEN
SAFE. A keypad will pop up. Input 23448803 and click on the "Enter" key on
the keypad. OPEN BRIEFCASE. You will be prompted for the entire
combination: enter 762134. PUT ID IN SLOT. INSERT MICROFILM.
The CIA offsets to the U.S. military codes are given by branch of service.
The offset for the U.S. Navy is +3. CLOSE BRIEFCASE. Walk across the
passageway to your cabin. Walk to the computer and save the game.
Pause the game (with the Control-P key combination). Use the letters and
numbers from the U.S. Navy code book to translate the code keys into two
sets of three numbers each. Each set of letter combinations represents Page,
Line, and Word in the game manual. For example, my Washington code keys
are: "FH - E - D" for the primary word, and "H - G - E" for the secondary
word. Looking in the code book, "FH" translates to Page 15, "E" to Line 2,
and "D" to Word 4. The fourth word on line two on page fifteen is: STEER.
This word is my primary code key for the Washington message, and it is this
word I will type into the computer when asked for the primary code key.
Translate the secondary code key for the Washington message in the same way.
(The letters for your coded messages may be different, but the process is
the same.)
Prepare the CIA code keys by adding three numbers to the U.S. Navy code
book: A = 3, B = 1, C = 9, D = 7, E = 5, F = 4, G = 6, H = 8, I = 0, J = 2.
Using this code, translate the CIA code keys in the same manner as above,
using the manual to arrive at the Page, Line, and Word for the primary and
secondary CIA code keys.
Now, USE COMPUTER. Enter the Washington primary and secondary code keys
(words from the manual's colored boxes) first. You should see a message
which begins, "Contacting fisherman...." You will be asked if you wish to
decode another message. Answer Y. Enter the primary and secondary CIA code
keys. You should see a message which begins, "Russian warships...." If you
receive a nursery rhyme, you have entered the code word incorrectly. Review
the above process and try again. If you have received both sets of messages,
answer N when you're asked if you want to decode another message, and exit
the control room to the left. Walk to the stairs and descend.
BLACKHAWK: BOSS DICE
You are now in the galley. LOOK AROUND. LOOK TABLE. Walk to the table, save
your game, and TAKE BOTTLE. Oops! It has an owner, and he wants to wager on
Boss Dice for it. Answer YES when he asks if you want to play. Instructions
for this game are on Page 30 of the game manual. You must win the first
series to get the bottle, but if you win all of his money, you will receive
a more valuable gift. When you win the bottle from the old salt, he will
ask if you want to play again. Answer YES, though you can finish the game
by just getting the bottle. You cannot save a game during play; if he wins
the last hand, restore and play again. GOOD LUCK!
BLACKHAWK: EXECUTIVE OFFICER
Now is the time to exercise your official duties as outlined on Page 5 of
your manual. Follow the same route under the stairs that was taken by the
Old Salt. Move left until the screen changes, and you find yourself in a
shaft with a ladder. CLIMB DOWN. Exit through the right door. Walk to the
torpedoman. TALK MAN. Walk to console. CYCLE EQUIPMENT. Walk to the
conveyor belt and face it. INSPECT EQUIPMENT. REMOVE CYLINDER. MEASURE
CYLINDER. Exit this room to left. CLIMB UP. Exit through the left door.
LOOK AROUND. Walk to the cabinet. OPEN CABINET. LOOK CABINET. LOOK
CYLINDERS. TAKE CYLINDER. Choose the 6" cylinder. TAKE COTTER PIN. CLOSE
CABINET. LOOK LATHE. PUT CYLINDER IN LATHE. SET LATHE. Choose 1". TURN ON
LATHE. Walk to the drill press. USE DRILL. SELECT BIT. Choose the 1/4" bit.
TURN ON DRILL. LOOK CYLINDER. Walk to the grinder. TURN ON GRINDER. Exit to
the left, then left again on the next screen.
LOOK ROOM. LOOK DRAWER. Walk over to the tool drawer. OPEN DRAWER. TAKE
HAMMER. Walk to the engine and shaft. INSPECT ENGINE. INSPECT GENERATOR.
Walk back to the right screen and exit. Go through the tunnel over the
nuclear reactor, and back to the machine shop, exiting on the right side of
the screen to the shaft. CLIMB DOWN. Enter the right door and walk to the
conveyor belt. INSERT CYLINDER. INSERT PIN. Walk to the console. CYCLE
EQUIPMENT. Exit left to the shaft. CLIMB UP. Use the right exit, walk to
the stairs, and CLIMB UP.
BLACKHAWK: RUSSIAN DESTROYER
Once again, when entering the control room, the captain will order you into
the pilot's seat. Save the game as soon as you are at the control panel
screen.
"Maintain current heading." Do nothing.
"All ahead full." Tap the plus key three separate times.
"Set depth for 300 feet." Tap the up-arrow key once and watch gauge #5.
When the gauge number reads 300, tap the down-arrow key once.
"Acknowledge when depth is attained." DEPTH CONFIRMED.
"Maintain course and depth." Do nothing.
"Reduce speed to 2/3." Tap the minus key once.
"Make your depth 100 feet." Tap the down-arrow key once, watch gauge #5
until it reads 100, then tap the up-arrow key once.
"Ahead slow." Tap the minus key twice.
"Surface." Tap the down-arrow key once. When gauge #5 reaches 35, it will
stop scrolling, indicating you have reached the surface. Tap the up-arrow
key once.
The captain will invite you to go "topside" with him. GET UP. The view from
the bridge is magnificent. The captain starts to mumble. TALK CAPTAIN.
Oops! Russian ships! The rest of this sequence is automatic, and you will
go below. The captain is injured, and you are left to fight the Russians
alone!
When you appear again in the control room, immediately take your seat at
the control panel, and save your game! Sonar will report contact with the
Russian destroyer, and starts to report distances. Submerge by tapping the
up-arrow twice. Use the mouse to click on control #15 as you are diving.
Pop down the fire control panel by clicking on #23. Check gauge #5, and the
tap up-arrow key twice when you've reached 600 feet or so.
Click on "A" to select the decoy torpedo (pictured in the manual on Page
12). Click on "B" to lock the decoy on target. The Russian ship will begin
firing torpedoes. You are running silent, so you needn't worry...yet! When
the white line appears on the view screen (#31), save the game, and click
on "D." (Note that there is an alternate solution to this puzzle in the
last part of this walkthru.)
In quick succession, click "B" and "D" again, then click "A" twice. (Start
with the Harpoon torpedoes.) Click "B" and "D" again. (Repeat this process
as many times as it takes to sink the Russian destroyer.) Each time the
enemy fires a torpedo (red line), you must click (or tap) "A" to select a
decoy, then "B" and "D". When there are no torpedoes in the water, click
"A" twice to select the Harpoons again. If you are empty, click "A" twice
to select the Stinger. Remember to click "B" and "D" each time you want to
fire. Watch screen #31: When the Russian ship has been hit three times, it
will disappear from the screen, and sonar will report, "Coast is clear."
The radioman will announce another set of coded messages. Click on #23,
click on #15, GET UP, and save the game. Walk to the radioman, and TALK MAN.
He will give you the second set of primary and secondary code keys for the
new Washington and CIA messages. Follow the same procedure to decode as in
the first set of messages. Walk to your cabin, go to the computer, and USE
COMPUTER. (Use the Control-P key combination to pause the game.) Look up
the code keys, and enter the appropriate primary and secondary keys for the
Washington message. If your entry is correct, the message will begin,
"Contacting fisherman...." Answer Y when asked if you want to decode
another message. Enter the primary and secondary code keys for the CIA
message. If that's correct, the message will begin, "After polar...." Type
N for no more messages. Exit the control room to the left.
BLACKHAWK: ICEBERGS
Walk to the pilot's seat, and sonar will report icebergs in the area. Click
on #20, and save the game. Soon, the icebergs will appear. Use the left-
and right-arrow keys to pilot the sub back and forth through the icebergs.
While weaving back and forth, watch gauge #30. Try to stay as close to 0 as
possible. (I was able to get a perfect score when I followed this
strategy.) When safely through the field, sonar will announce, "All clear."
You will then be informed of a stationary signal: Ice Station. CONTACT
STATION. The radioman will report another set of coded messages. GET UP, go
to the radioman, and save the game. TALK MAN, and you will be given a third
set of messages from Washington and the CIA. Follow the same procedure to
decode them as described before. Walk to the cabin, go to the computer, and
USE COMPUTER. Again, type the primary code key first, then the secondary
for the Washington message. If correct, the message will begin,
"Rendezvous...." Type Y to decode the second message. Enter the primary and
secondary code keys for the CIA message. If correct, the message will begin,
"Diversion...." Type N for no more messages. Exit left to the control room,
and return to the pilot's seat.
BLACKHAWK: RUSSIAN SUB
(See the end of this part for an alternate solution to this puzzle.) Sonar
will report a deep trench. Tap the up-arrow key three times to begin a deep
dive. Sonar will report a faint signal coming from the Russian submarine.
Click #32. Watch gauge #5 for your depth and gauge #6 for the water
temperature.
When #5 reaches 2300, tap the down-arrow key three times. The Russian Alpha
sub will begin firing torpedoes. Begin a zigzag course by using the right-
and left-arrow keys (don't wander too far off course (gauge #30) from 0!),
alternating right full rudder and left full rudder. Watch the torpedoes
pass over you, and the white line will begin to shrink. Sonar will announce
that the sub has disappeared. Hooray!
BLACKHAWK: U.S.S. COONTZ
You will see a message that you are now off the coast of Portugal, and
sonar is picking up "irregular" signals. Click on #17 so that one ping is
issued, then click #17 again. Sonar will report that it is an American
destroyer, and according to plan, we are to follow under the destroyer to
Tunisia. Save the game.
A screen will appear, showing the Coontz as a yellow plus sign. Wait until
you are near the COONTZ, then tap the left-arrow key once; wait about five
seconds, then tap it again. You should get a screen announcing that your
navigation skills rate 5 out of 5. Now comes the tough job of trying to
stay under the Coontz! Once again, I am not sure if this sequence is random,
so I will let you pilot this. Try to anticipate the destroyer, and save
your game every time you progress. Stay very close to the Coontz. When it
disappears from the right edge of the screen, you are in Tunisia!
The captain is back on duty, and orders you to periscope depth. Tap the
down-arrow once, watching gauge #5 until it reads 70, then tap the up-arrow
once. Be sure your speed is slow (one light on #32), and the wheel is at
center position. You will be told when to GET UP. Once in the control room,
the captain will direct you to the periscope.
Walk to the periscope. LOOK IN PERISCOPE. Move the periscope with the arrow
keys to get a reading on both the harbor and the oil rig (located on a
platform to the left of the main island). Use the down-arrow key to exit
the periscope. Walk to the sonarman. TALK MAN. PING RIG. PING HARBOR. He
will give distances to both places; make note of them. Walk to the stairs
and descend to the galley. Walk under the stairs, and exit left from the
shaft. Walk to the machinist and GET KEY. Exit right back to the shaft.
CLIMB DOWN, go right to the torpedo room, and go right. Face the back wall.
LOOK. OPEN CLOSET. TAKE EXPLOSIVE. TAKE FLARES.
Exit left to the shaft, then exit the shaft through the left door. LOOK
AROUND. Walk to the left rear of the screen to a closet. OPEN CLOSET. The
machinist will get your scuba gear. Exit right to the shaft, and CLIMB UP.
Exit left through the machine shop and tunnel to the engine room. Just
right of the hatch stairs, you will see a compartment door and a button. Go
to the compartment; PUSH BUTTON. LOOK COMPARTMENT. TAKE VEHICLE. INSPECT
VEHICLE. INSPECT VIBRATION. INSPECT SHAFT. MEASURE SHAFT.
Walk to the tool drawer, OPEN DRAWER, and TAKE WRENCH. Choose 1/2". Walk to
the right. The game will automatically put the vehicle back in the
compartment. Walk right two screens to the machine shop, and go to the
cabinet. OPEN CABINET. TAKE NUT. Choose 1/2". TAKE WASHER. Choose 1/2".
Walk back to the engine room and get the dive vehicle. (See above) PUT
WASHER ON SHAFT. PUT NUT ON SHAFT. TIGHTEN NUT WITH WRENCH. TEST VEHICLE.
ENTER COORDINATES. Input 282 degrees and 2850 yards for rig; 40 degrees and
1640 yards to harbor. Walk to the ladder. CLIMB UP. OPEN HATCH. LOOK AT
ROOM. WEAR GEAR.
TUNISIA
As you exit the ship, go left nine screens in a row, then up three screens.
PLACE EXPLOSIVE. Swim up three screens, right eleven screens, and up one
screen to reach the harbor. Save the game. Swim up past the first set of
rocks, then left two screens to the cave, and enter it. Time is of the
essence! Swim up twice, right, down, and right. "Down" is a narrow hole;
save your game when you enter the fourth screen! You get 10 points for
having the device and for going through the caves!
You enter the harbor on the other side of the magnetic screen and
automatically swim up. Swim right two screens to the pier. HIDE VEHICLE.
Swim left two screens and wait. A net will drop; swim to it. PUT BOTTLE IN
NET. Wait. When the net is returned empty, swim up. Approach the fisherman
and give the codename: ICEMAN. (Hm, must be a title in there somewhere!) He
hands you a fish. LOOK FISH. LOOK LINE. REMOVE HOOK. LOOK WEIGHT. OPEN
CAPSULE. LOOK MAP.
Exit to the upper-left between the rocks. Go through the open door into the
building and remain out of sight. LOOK ROOM. LOOK CRATE. LOOK CLOTHES. WEAR
CLOTHES. Wait until the guard passes. Exit to the right. On the next screen,
exit up, then on the next screen, exit to the left.
You will come to an oasis. LOOK WOMAN. ICEMAN. GET MAP. LOOK MAP. Exit this
screen to the right, to the right on the next screen, up on the next screen
up, then to the left on the last screen. Stacy's apartment is the one with
the double doors. Go to the phone. LOOK WALL. TAKE CARD. READ CARD. Walk to
the window and LOOK OUT. Walk to the canisters on the kitchen counter. TAKE
LARGE CANISTER. OPEN CANISTER. EMPTY CANISTER. REMOVE BOTTOM. REMOVE FOAM
RUBBER. LOOK IN CANISTER. TAKE GUN. LOOK GUN. REPLACE CANISTER.
Walk to the refrigerator and LOOK ON TOP OF REFRIGERATOR. TAKE TAPE. LOOK
IN REFRIGERATOR. TAKE BUTTER. OPEN DISH. OPEN BAG. READ PAPER. CLOSE
REFRIGERATOR. Go to the phone and USE PHONE. Enter 03-120-1204. TALK MAN.
USE PHONE. Enter 13-555-8097. TALK MAN and wait. Soon, there will be
someone at the door. OPEN DOOR. Wait until the man asks for money. USE GUN.
REMOVE CLOTHES. USE TAPE, and wait.
Stacy will arrive and ask if you have read her note. Tell her YES. She will
then give you more instructions and leave. You exit and are automatically
put in the van, which will drive around the corner and stop in front of the
embassy. Save the game.
HIDE GUN. TAKE PLATTER. Open the door and walk to the entrance. You will be
frisked and escorted to the room where the ambassador is being held. PUT
FOOD ON TABLE. REMOVE LID. TAKE GUN. FIRE. (Tap the spacebar to repeat the
command, then press the ENTER key.) You must be quick with these two shots;
there is no need to turn and fire. Walk to the nearest guard. SEARCH GUARD.
Walk to the ambassador. FREE MAN. CHANGE CLOTHES. LEAVE, and save your game.
If you are not fond of or good at arcade sequences, the next one is a
toughie. You can skip it by pressing the "F8" function key, though you will
lose points if you do. The trick is, once you are safely back in the van,
save your game, and set the game speed to 9 (press the ESC key and choose
"Speed" from the menu bar).
As you enter the final arcade sequence, remember that each key should be
lightly tapped only once. Do not hold down the arrow keys. When the screen
changes to the hill view, take note of the explanation box at the lower
left of the screen. Tap the up-arrow key once. Just before the first curve,
tap the down-arrow key once then quickly tape the left-arrow key once. Each
time you turn successfully, tap the up-arrow key once to briefly increase
speed. As you near each turn, repeat the slowing-down, turning and
speeding-up maneuvers the appropriate arrow keys. Continue this process
until you are at the top of the hill.
At the slowest speed, I found hitting the up-arrow key once only brought my
speed up to 25 mph, and I rounded the curve at 20 mph. It is important to
speed up in the first couple of straightaways, or the terrorists will catch
you. Using this method, I went right up the hill on the third try. Finally,
you enter the endgame, and it takes over from here.
ALTERNATE BLACKHAWK SOLUTIONS: I finished with 270 of 300 points. I know
this score can be improved by setting the waypoints for the voyage a little
more accurately, and more points are available for navigating more
precisely under the Coontz (I received 8 out of 10 here). It is also
possible to earn more points for sinking the Russian submarine rather than
staying out of sight in the trench. To do this, you will need to save some
of your torpedoes and decoys from the earlier encounter with the Russian
destroyer by sinking the ship with as few of your weapons as possible. Both
Russian ships will sink with three direct hits.
All in all, I enjoyed the depth of this game and its puzzles. Too many
adventure games are either too short or too easy. CODENAME: ICEMAN will
give you your money's worth in both length and difficulty. I hope you enjoy
this game as much as I did!
CODENAME: ICEMAN is published and distributed by Sierra On-Line.
This walkthru is copyright (c) 1990 by Linda Lindley and THE ELECTRONIC
GAMER (tm). All rights reserved. Not to be distributed without permission.