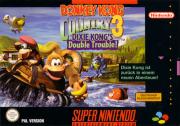
Donkey Kong Country 3
Dixie's Double Trouble
Hints & Tips
WOW!
Whoa!
Aye Carumba!
Hints & Tips
103% is the maximum percentage available from game play.
When the game is over, you can keep the music playing (like you aren't
already sick of it?) by pressing the L,Y,X,A,B, and R buttons that
correspond to the blocks and tones. The blocks spell out G-A-M-E O-V-E-R
and the notes correspond like this:
L = G block
Y = A/M block (turned slightly sideways to show two letters)
X = E block
A = O block
B = V block
R = E/R block (turned slightly sideways to show two letters)
Also if you keep pressing any one note rapidly the block will start
rising up to the top of the screen. If it gets too high, it drops back
down.
If you quit playing with the notes for a few seconds, play time is over
and you go back to the main screen.
Krematoa, The Lost World can be accessed by driving around the four
rocks on the map in a complete circle (clockwise or counter-clockwise
doesn't matter). If you go inside the rocks at any time you have to
start over.
If you can collect 41 (that's one from every level including the Lost
World, Krematoa) DK coins, you can use them to buy a Gyrocopter from
Funky Kong. You need the Gyrocopter to get to some Bonus levels.
Questions and comments from fellow players:
"I've gotten though pretty much everything - before I found your page -
but I can't seem to defeat Knautilus. I get as far as the bolt coming
towards me but don't know what to do to not get killed from it. Do you
know?
Great page, by the way."
-Angie Hance
Angie offered some other helpful advice and a tip for beating Knautilus,
check it out.
-Steve & Jake
"Hi I did that erase code and dixie just laughs and it doesn't erase
your game.
Also i can only get 40 DK coins. And your FAQ didn't say spesificly
where the last one was. Every level on my game has the little gold flag.
In your FAQ you said that there were 6 in Cotton Top Cove, is there
really because I can't find it if there is..."
-Darwin Albert
"We have found your page a great help. You have helped us go have 52% to
somewhere in the70%. But one thing confuses us. At fish food level we
had 20 DK coins and we did At Squirt's Shadow you say we should have 21.
We didn't get one there and we can't figure out where it came from. We
need one more to go to Funky. Can you help us?"
-Eric W. & Ronda Anderson
"Hello, Thanks a lot for your very good tips and hints. It has not
helped me yet with the roll-jump that is necessary to get from one high
point to another (in Tidal Trouble, for instance), but I have used it a
lot. I wonder, though, if it is correct that one will get a DK coin at
the end of Squirt's Shadow? I have finished it several times without
getting a coin. Please let me know if I have missed something.
Thanks again for a very good site!"
-Bjorn P. Bergdahl
Yikes! We erroneously stated that 6coins were possible in Cotton-Top
Cove, this has been corrected to reflect a total of 5 possible DK coins
in Cotton-Top Cove. Sorry for any confusion this caused.
-Steve & Jake
"Do you know if there is a code for donkey kong country 2 or 3 to play
like in donkey kong country 1 when you put the code "bad buddy"."
Camilo Cepeda
None that we know of - anyone else?
-Steve & Jake
"I have a theory for the water code....try it out on Tidal Trouble...
It seems to make the play a bit faster on the water worlds, so you don't
have to paddle as much, and it is a bit easier to make Kiddie
skip...(but I still can't make him hit that bonus level! :(
Just thought you'd like to know :)"
-Kriss
Thanks Kriss! Has anyone else tried this with the same results?
-Steve & Jake
"I have two things to say about [Donkey Kong Country 3]"
First of all, my sister figured out how to know if you have gotten all
the and DK coins in each level. Once you have passed a level, a pink or
blue flag is raised. If it has a yellow triangle on it, then you have
gotten the DK coin. Please give credit to Samya Ahmed Osman for that
one.
Second, I don't seem to understand the description of bonus barrels in
the level Swoopy Salvo. You only seem to talk about two bonuses, but I
have gotten them both and still the ! after the name is not displayed,
meaning there must be another bonus. If you find it, can you please send
and tell me where it is?
-Osman Ahmed Osman
Right you are Osman! The pink or blue flag is determined by who wins the
level for you (Kiddy=Blue, Dixie=Pink), and a gold flag is flown when
you've beaten the level and retrieved the DK coin.
As for the bonus barrels in Swoopy Salvo, there are actually three (all
the levels in Krematoa have 3 bonus barrels). Angie Hance
reported that the 3rd barrel is difficult to
find but that she did find it - if you write to her maybe she'll share
it with us...? (We'd tell you but we haven't found it yet either!)
-Steve & Jake
Thanks to Joshua Steele (self-proclaimed "Nintendoaholic"), Angie Hance,
Darwin Albert, Eric W. & Ronda Anderson, Bjorn P. Bergdahl, Camilo
Cepeda, Osman Ahemd Osman, & Kristin M. Boyce for suggestions and input!
Cheat Codes
About the Bears
About the Banana Birds
Worlds:
Lake Orangatanga
Kremwood Forest
Mekanos
Cotton-Top Cove
K3
Razor Ridge
Krematoa (the Lost World!)
Knautilus
Lake Orangatanga
Lakeside Limbo
Doorstop Dash
Tidal Trouble
Skidda's Row
Murky Mill
Belcha's Barn (Boss)
Kremwood Forest
Barrel Shield Bust-Up
Riverside Race
Squeals on Wheels
Springin' Spiders
Bobbing Barrel Brawl
Arich's Hoard (secret)
Arich's Ambush (Boss)
Mekanos
Fire-Ball Frenzy
Demolition Drain-Pipe
Rip Saw Rage
Blazing Bazuka's
Low-G Labyrinth
Kaos Karnage
Cotton-Top Cove
Bazza's Blockade
Rocket Barrel Ride
Kreeping Klasps
Tracker Barrel Trek
Fish Food
Squirt's Shadow (Boss)
K3
Krevice Kreepers
Tearaway Toboggan
Barrel Drop Bounce
Krack-Shot Kroc
Lemguin Lunge
Bleak's House (Boss)
Razor Ridge
Buzzer Barrage
Kong Fused Cliffs
Floodlit Fish
Pothole Panic
Ropey Rumpus
Barrus Barrier (Boss)
Kaos Kore
Konveyor Rope Klash
Kreepy Caverns
Lightning Look-Out
Koindozer Klamber
Poisonous Pipeline
Kaos Kastle (Boss)
Krematoa
Stampede Sprint
Kriss Kross Kliffs
Tyrant Twin Tussle
Swoopy Salvo
Rocket Rush
Knautilus
the end!
Lakeside Limbo
Red balloons on top of first two shelters (have Kiddy throw Dixie up
there)
After first DK barrel find crack in the planks, throw Kiddy up so he
lands on the crack (provides access to the barrel - stars, Bonus
coin)
DK coin after exiting previous barrel, underneath the O (face the
lizard and throw the barrel provided over his head so it hits the
opposite wall and rolls into his back)
First shelter after the two lizards: invisible bear coins, one at
each end of the roof of the shelter (right before the save point).
Again, Kiddy throws Dixie up there.
Under N go in the water to the right, swim past barrel, jump up in
empty space to the right of the barrel (invisible green balloon),
then back into Bonus Barrel ·
After returning from Bonus level, get elephant and proceed to bird
with big red stomach. Use Y button to get the barrel provided and
hit the bird with it (gives the G to finish spelling Kong).
At the No Elephant sign (red circle with slash through it) jump
off the left edge where the sign is with Dixie on Kiddys shoulders.
In mid-air throw Dixie up and slightly left (Blue balloon).
Shelter at end of the level, invisible banana bunch on roof and
inside (2 bunches)
WARP: To the far left of the platform where the very 1st DK barrel
is. Put Dixie on Kiddy's shoulders and throw her up and to the left.
you should now have: 1
Doorstop Dash
After 2nd tractor door silver coin above. Put Dixie on Kiddys
shoulders, throw upwards to retrieve.
After the three green bees (2nd floor) go left past hanging rope to
a tractor door that is too high to jump into. Put Dixie on Kiddys
shoulders, throw upwards to grap the door opening handlebars. As
soon as the door is all the way open, use Dixies helicopter twirl
to go left through the open door. (Red balloon).
After red balloon, go left to Bonus barrel, collect 60 stars for
Bonus coin.
After elevator platform, jump continuously as you go down the ramp
towards the hanging rope on the left. (Red balloon somewhere in
there).
Top of rope, go right. Pull handle and proceed through door to right
for Bonus barrel. (Find the coin)
After return from Bonus, silver coin (guarded by rat) above
sandbags.
After the G is a jumping off point (to the right) in an S
pattern. Use Dixies helicopter to slow your descent and pick up
bananas and a green balloon (towards the end)
During descent keep your eyes peeled for a place to land on the
left. This is where youll get the DK coin. Pull handlebars to open
the tractor door. Face the lizard, throw the barrel provided through
the door (it will roll around, hit the wall and get the lizard in
the back). Continue your descent, veer right when possible to pick
up the green balloon.
WARP: After the 1st elevator, in the upper right corner of your
screen.
you should now have: 2
Tidal Trouble
At beginning of level Put Dixie on Kiddys shoulders, throw upwards
to get barrel from roof of first shelter (needed to get the DK coin
which follows). · Throw barrel over lizards head, but not too high.
(It must ricochet off the adjacent wall and hit the lizard in the
back).
Under the O get in the water and head left to pick up Enguarde.
As Enguarde, go right to the Bonus barrel (Collect 30 stars). (NOTE:
You can kill the spiny if you attack him when he is fully opened,
otherwise you will be defeated.
After losing Enguarde head right, silver coin above green bee.
Switch to Dixie, swim under the bee and to the right (against the
current) and jump out of the water close by, using the helicopter
trick to get the coin.
After the extra tall platform (goes beyond the top of the screen)
are two ladybugs flying in place. Jump out of the water and on to
first one then the other to land on the platform to the right. · On
the platform, use the green running barrel to hit the fat red bird
(letter N for Kong).
Tumble jump to the right to land on the next platform and Bonus
Barrel.
Right before pole at end of level, put Kiddy on Dixies shoulders
and throw him into the air so he lands on the crack to get Arrow
barrel (red balloon).
WARP: Stay on the short fence in the water, before the platform
where there are two green Klasps (it has a low platform with a
running Klasp, then a high platform with nothing, then a low
platform with a running Klasp (the green barrels)). Put Dixie on
Kiddy's shoulders and throw her up and left .
you should now have: 3
Skiddas Row
House with DK barrel on top, guarded by alligator. Use barrel to
kill alligator, invisible bear coin in front of doorway.
Two crevices, big gully then Bonus barrel in the air at top of next
gully (dinosaur underneath). Kill four dinosaurs to get Bonus coin.
Pick up bear coin automatically on your way back!
To the right after first cabin following the save point, lizard with
DK coin. Throw barrel over his head to hit him in the back and get
the DK coin.
Next cabin with two dinosaurs runnng on top, kill both of them then
jump into Bonus barrel in the air to the right of the cabin roof. ·
Bonus coin - just make it to the right; you dont have to kill all
the baddies you encounter to get the coin.
To the right at the top of a gully is a ladybug in mid-air. Jump on
this ladybug to get a red balloon.
WARP: Get on the the roof of the first cabin and stay to the far
left. Put Dixie on top of Kiddy's shoulders and throw her up and to
the left.
you should now have: 4
Murky Mill
First elevator is fast! It ascends in an S pattern. Collect
bananas.
Rats that are not under a light may be killed by stomping on them;
rats in lighted areas must be killed with barrels.
First raised platform (dark area) jump off to the right (invisible
bear coin).
Couple of platforms over (left) is a platform with a light shining
on it and a single rat guarding it. After killing the rate with a
barrel, jump up in the light and pick up a green balloon.
To the left is a bouncing crocodile, you need to stomp him to get
the O for Kong. Dont kill him with a barrel.
Take a barrel with you when you go down the elevator platform from
here for the green bee at the bottom.
After save point, either kill the green bee with the barrel you
brought down or jump over the green bee, pick up the barrel and
return to the green bee and kill him. Jump on the hatch door he was
guarding to enter Bonus level. (Bonus coin)
At the bottom of the next platform elevator and to the right is the
DK coin. Pick up a barrel with the elephants trunk and throw
upwards (over the partition) to ricochet off the wall and hit the
lizard in the back.
Bottom of shaft with 4 red bees, invisible bear coin in lower right
corner.
Y made of bananas with guarding rat. Use the Y button to suck
the barrel across the floor and use it to kill the rat.
At bottom of next shaft, head left to invisible Bonus barrel, shoots
you up and left. At this platform, use Y button to suck the barrel
across the gap (it will fall in and kill the green bee guarding).
Fall in the gap to get the Bonus barrel (Bonus coin).
After return from Bonus, pick up barrel and sneak it past red bee.
Kill the two rats in the spotlight.
Jump on bouncing crocs to get to the G for Kong.
Get more barrels to kill two more rats before the No Elephants
sign.
WARP: After the 1st elevator, it's in the upper left corner of your
screen.
you should now have: 5
Belchas Barn (Boss)
Use Kiddy to stomp the barrels that come out of Belchas mouth.
Stomp the barrel once to reveal the bug inside, and once more to
still the bug. The bug can then be picked up and put in Belchas
mouth.
ITEM: Bonus coin.
Kremwood Forest
Barrel Shield Bust-Up
If you dont want to warp to the end, go in the Bonus barrel to be
shot up and get a bear coin.
At top of this tree use TNT barrel to blast hole in left of tree. Go
outside and enter Bonus barrel (Find the coin)
After save point, just before top of rope, platform on right has
invisible bear coin.
After the N for Kong go outside, stand on right branch. Put
Dixie on Kiddys shoulders, throw upwards and left to next branch.
Follow branches right then left to get to the DK coin (should be
visible on screen by now). Throw barrel in the entrance, it will
roll down and hit the lizard. Use TNT barrel to re-enter tree.
Top of next rope use TNT barrel to exit tree to the left. Go up the
branches as far as possible then enter the tree. Use Dixies
helicopter to go as far right as possible (youll go through two
trees) until you hit a Bonus barrel to the right. (Bonus coin).
WARP: After two circling bees with banana bunch in center, go into
tree on right. Fall through hole and to the left for warp to end of
level.
you should now have: 6
Riverside Race
Right after K for K-O-N-G, jump on Sneek (the rat) and into the
air to get an invisible bear coin. In the first pool after Sneek
(the rat) and bear coin, use Kiddys tumble jump (roll, hit B each
time you hit the water) to get to the opposite side of the pond. At
the top of this bluff is a Bonus barrel (Grab 15 Bananas)
Hint: If you swim across the top of the water you can usually avoid
the green fish.
Right after the save point tunnel emerge from the pond and jump on
the two ladybugs to the left to pick up a red balloon (the swarm
wont hurt you after you during this time)
In the pool under the N for K-O-N-G is an Invincibility Barrel.
Break the barrel and once invincible jump out of the water onto each
of the three red Buzzs (bees) to get up to the opposite side of the
pond. At the top is a Bonus Barrel (Bash the Baddies).
Go left after returning from Bash the Baddies and you can use the
Invincibility barrel again, this time to go through the normal
course.
Right after the G for K-O-N-G, head right to throw the swarm off
course. Then head left, back towards the pond you just came out of.
Use Kiddys tumble to skip over the top of the pond and up onto the
opposing shore. At the top is the DK coin.
Special Hint: Complete the entire course in under 1:15 and get a
special bonus. (Dont stop for any secrets or bonuses!). After
pulling the end of course flag a "New Record!" message will appear.
Later in the game, when you visit Brashs Cabin, hell get really
mad because you broke his record. When he starts to pound on his
desk it will shake a log loose which will float down the river and
create a walkway to a secret cave where you can pick up an extra
banana bird. (You don't see any of this till you leave his cabin)
WARP: In the top of the screen right above the center of the first
pond.
you should now have: 7
Squeals on Wheels
At the O for K-O-N-G, go past it to the left. Defeat Sneek (the
rat) in the wheel and use the platform to get on top of the wheel
and onto the surface to the left. Enter a Bonus Barrel (Collect 20
Stars).
Right after save point, defeat first Sneek (the rat) in wheel.
Standing on this wheel defeat the one above it. Put Dixie on Kiddys
shoulders, throw upwards to get on upper wheel, then onto surface to
the right. Enter Bonus Barrel (Grab 15 Bananas)
After next platform where two green Buzzs (bees) circle a Sneek
(rat) wheel, go to platform on left and Put Dixie on Kiddys
shoulders, throw upwards to get on top of wheel then Put Dixie on
Kiddys shoulders, throw upwards again to get onto surface to the
right, for the DK coin.
Under Auto-Fire barrel go all the way to the left corner to get
invisible bananas.
After fallling through all the trap doors, find Parry (the Parallel
Bird). Once hes free jump directly up to get an invisible bear
coin.
Have Parry (the Parallel Bird) run into the fat bird after the
invisible bear coin to get the G for K-O-N-G.
Blue balloon when you finish the course with Parry (the parallel
bird) intact.
WARP: After you open the first door by defeating Sneeks (the rats),
go through the door and use Kiddy to throw Dixie straight up.
you should now have: 8
Springing Spiders
First tree, invisible bear coin is guarded by Bristles (the
porcupine).
Exit the tree right after the K and drop between the branches and
to the left to get Squawks (the parrot).
Up and to the right is a trail of bananas. At the very top of this
trail go all the way in to the section to pick up two invisible bear
coins.
Bonus Barrel just outside of this area. (Grab 15 bananas).
Bear coin when you finish this section with Squawks (the parrot).
Right after save point jump over red Buzz (bee) (using Springin
Spider) and to the left find an invisible bear coin.
Enter the tree and go all the way into the first compartment to find
an invisible banana bunch.
Use the red Springin Spider that goes to the top of the tree to get
to the next platform. Dont leave the tree yet! Put Dixie on Kiddys
shoulders, throw upwards to get to a higher platform inside the
tree. Switch to Dixie, have her throw the barrel provided out the
hole above (Up + Y) to get the DK coin (outside).
Use TNT barrel to get back into the tree. After the DK coin, switch
to Dixie and use the branches on the left to get to the top of the
next tree. Use the red Springin Spider to get to the top platform.
The N for K-O-N-G is outside.
After getting the N for K-O-N-G, use Dixies helicopter spin to
float to the left and pick up a red balloon.
Use TNT barrel to get back in the tree. First small platform on the
right has invisible bananas.
At the top of this tree (where the green Buzz (bee) is), go outside
between the trees and wait a minute for Swoopy (the woodpecker). He
will lodge his beak in a tree and you can jump on his body to get to
the higher branches to get the G for K-O-N-G.
When you go into the tree afterwards, fall down and to the right for
a Bonus barrel (Grab 30 stars).
If you re-enter the space where the Bonus barrel is and fall left,
you will find an invisible bear coin.
WARP: When you enter the first tree (where the 2nd Springin' Spider
is, go to the left wall of the tree and use Kiddy to throw Dixie
straight up into the warp barrel (it's invisible).
you should now have: 9
Bobbing Barrel Brawl
At the first DK barrel you find, throw upwards to hit the fat bird.
Hell drop a TNT barrel on the red Buzz (bee) below him to reveal
the K. (Hint: If you miss with the barrel you can throw Dixie).
After the O for K-O-N-G, stand on the floating metal barrel and
press Up+R to shoot the fat bird, who will drop another silver
barrel for you to stand on.
After the Auto-fire barrel puts you on the other side of one of the
ponds, have Ellie (the elephant) shoot the fat bird. A barrel will
drop on the red Buzz (bee) below and reveal a bonus barrel. (Find
the coin)
Hint for Bonus level: Throw the barrels upwards, not forward. This
will make them land closer to you.
After you defeat the two red Buzzs (bees) with the TNT barrels,
dont defeat the ladybug which follows! Jump on her to reach the
bear coin at the top of the screen.
DK coin is in plain sight after the two red Buzzs (bees) under a
cliff.
In the pond where a fat bird is surrounded by two circling green
Buzzs (bees), shoot all three with Ellies (the elephants) trunk
to get another barrel to stand on.
In the next pond is a Bonus barrel, on the bottom of the pond. To
get it, go to the right and wait for two ladybugs to fly overhead.
Then jump on first one, then the other and land in the center of the
pond. You will land hard enough to enter the Bonus barrel (Grab 10
stars)
Pond with fat bird and one green Buzz (bee) circling, shoot both to
get another barrel to stand on.
Banana bunch if you finish the level with Ellie (the elephant).
WARP: Right after you encounter the first red Buzz (bee) use Kiddy
to throw Dixie straight up.
you should now have: 10
Arichs Hoard
(secret location formed by log bridge if you beat 1:15 in the Riverside
Race) Follow pattern of blinking gems with control pad:
B = Yellow
A = Red
Y = Green
X = Blue
Arichs Ambush (Boss)
When the spider is descending, make sure the barrel hits him in the head
(Dixie: hold barrel overhead, Kiddy: Throw upwards).
Hint: When Arich is shooting the lethal green pellets, hide in the lower
right hand corner of the screen and put your barrel down.
After youve defeated Arich, bring the patch (that white x-shaped thing)
to Funky Kong. In return hell upgrade your transportation to a hover
craft. Now you can skim over rocks and get to some places that were
inaccessible before.
Hint: This would also be a good time to spend some of those Bear coins.
Go to Bazaars General Store and purchase the shell (and the mirror if
you have enough). You can now trade Barnacle Bear (island in the middle
of Lake Orangatanga) for another banana bird.
Hint: Go to the beach just left of Funkys Rentals (its blocked by
rocks, but you can now go over them!) Get another banana bird.
ITEM: Patch for the hover craft.
Mekanos
Fire-Ball Frenzy
Hint: The fireballs cant hurt you once they bounce one time.
Third bird over, invisible bear coin when you jump.
After save point, go right and jump to first platform on the
right (invisible bear coin).
After jumping on each platform (R-L-R-L-R) use Dixies
helicopter spin to go to the far left. (If you miss Put Dixie on
Kiddys shoulders, throw upwards to get on higher platform).
Float left to Bonus barrel (Bash the Baddies as Squitter (the
spider)).
Bear coin for completing this section as Squitter (the spider).
Single banana above bird shooting three fireballs in a row. Put
Dixie on Kiddys shoulders, throw upwards (aim at the banana) to
get on platform to Bonus barrel. (Grab 15 bananas).
After the N for K-O-N-G, take platform up (DK barrel on the
way) and head for platform on the right (DK coin).
you should now have: 11
Demolition Drain-Pipe
After N for K-O-N-G, single large end caps (they look like big
trash cans) then two large pipe caps on either edge of a gap, the
gap directly after this has a Bonus barrel (Grab 20 stars).
At end of level flagpole go left to find DK coin.
After the K for K-O-N-G, there are 5-6 green Buzzs (bees), then a
couple of large pipe caps, then 4 Buzzs (bees) positioned
low-high-low-high. Jump on the last (high) green Buzz (bee) to go to
a Bonus barrel (Bash the baddies).
you should now have: 12
Rip-Saw Rage
At doorway blocked by green bee, enter to get Bonus barrel using
barrel provided. (If you dont have time to get the barrel, you may
have to sacrifice Dixie or Kiddy). (Find the Coin)
Exiting tree blocked by green bee, visible Bonus barrel. (Grab 15
bananas). (You are temporarily invincible during this one).
Method 1: At the top of the tree the saw stops. Koin (the lizard) is
visible in the top left hand corner of the screen). Put Dixie on
Kiddys shoulders, throw upwards to get on the next highest branch.
Throw a barrel from this higher branch to hit the lizard from behind
and get the DK coin.
Method 2: Under the G is a single banana. When you get to it this
banana turns into an auto-fire barrel and you become invincible. You
can then get the G for K-O-N-G, a bunch of bananas and a barrel to
get the DK coin (top) with.
you should now have: 13
Blazing Bazukas
First rope at top of screen. Work your way left to get a DK barrel,
if needed.
Further left is an invisible bear coin.
Defeat Bazuka with TNT barrel provided to reveal hidden Squitter
(the spider) barrel.
Head right and start building webs where TNT barrel was, aim
upwards. At top of this space is a Bonus barrel (Find the coin)
Hint: You dont need to defeat all of the Buzzs (bees) to get the
coin.
After the O for K-O-N-G, go left to the Auto-fire barrel and go up
and left (not all the way to the top platform; there is a lower
platform on the left. Use webs to get across the gap to where Bazuka
is shooting barrels. Switch the barrel above him to metal barrels.
Return to the right side of the gap (Koin (the lizard) should now be
below you. When Koin faces right the metal barrels will hit him in
the back and you can get the DK coin.
Use webs to climb to the upper platform, go left from the save point
to a barrel being circled by a green Buzz (bee). Switch the barrel
so it resembles a wood barrel (instead of a TNT barrel) After the
G for K-O-N-G you are shot up through a series of barrels. At the
very top use Dixies helicopter spin to go to the far left for the
Bonus barrel (Find the coin).
you should now have: 14
Low-G Labyrinth
Right before the save point go left and up (over a stack of Buzzs
(bees)) to the Bonus barrel. (Collect 80 stars).
Pick up barrel at bottom of shaft with three Buzzs (bees)
criss-crossing. Wait in gap under stack of three Buzzs (bees) for a
chance to go right. (Invisible bear coin at top of this stack)
Carry barrel up next shaft (pick up N for K-O-N-G) and go left.
Use barrel to defeat Buzz (bee) guarding down shaft and go left to
Bonus barrel (Bash the baddies).
At left arrow (spelled out in bananas) go left and pick up metal
barrel. Carry up to Buzz (bee) guarding red balloon and visible bear
coin.
Pick up next wood barrel and go left to two Buzzs (bees) going up
and down rapidly. Defeat one and go to "No Parrots" section to pick
up metal barrel. Use barrel to defeat Koin (the lizard) for DK coin.
After DK coin, go left and use metal barrel to remove green Buzzs
(bees) from downward slanting shaft. At end of shaft are three bear
coins, bunch of bananas and an Invincibility Barrel. Go to right
(past where the re-appearing barrel is) and jump up into ceiling gap
guarded by two green Buzzs (bees) to get G for K-O-N-G.
you should now have: 15
Kaos Karnage (Boss)
Jump on the boss propellers to get up to the head, stomp on it.
After 3 hits the head will detach to reveal a metal skull creature
inside. Now the robot will be after you (look out for the exhaust
flames!) and the head will occasionally shoot lasers at you. The
metal skull creature takes an additional 3 hits to defeat, for a
total of 6 hits required to defeat.
ITEM: Defeating this boss earns you one ski. When you have the other
one you can upgrade your transportation at Funky Kongs shop.
Hint: Before starting this world you can swim to the small beach at
the upper right hand corner of the first bay you enter. Solve the
puzzle and youll be rewarded with another banana bird.
Cotton-Top Cove
Bazzas Blockade
Between the K and the O for K-O-N-G go below the fast moving
barracudas for a Bonus barrel (Fnid the coin).
Right before the save point is an invisible bear coin.
After the save point to the lower right hand corner of the
screen is a depression in the coral that contains an invisible
bear coin.
Straight up from the bear coin a line of barracudas emerges from
the left. There is a space in the coral and if you can time it
just right you can dart in between the barracudas and go down
to a Bonus barrel. (Bash the baddies). Pick up Enguarde (the
swordfish) here.
When you return from the Bonus barrel go right and downward to a
passage blocked by a red fish. The N for K-O-N-G is at the
bottom.
After the DK barrel go down and left and notice a depression in
the coral above some barracuda. Use Enguarde to pierce Koco (the
clown fish) for an invisible bear coin.
Finish the level with Enguarde for the G for K-O-N-G.
Before finishing the level with the flagpole, go all the way to
the right and retrieve the DK coin.
you should now have: 16
Rocket Barrel Ride
After first rocket barrel, go behind waterfall for bananas. Stay
in this barrel and jump out to the right for an invisible bear
coin. (Remember to aim back towards the barrel so you wont drop
to the end of this waterfall!)
After a couple more barrels youll notice a line of bananas in
front of a waterfall to the right. At the beginning of this line
is an invisible barrel which will Auto-fire you through all the
bananas and youll pick up an invisible bear coin in the
process.
Higher up there is a trail behind the waterfall with a line of
bananas on it. There is a banana missing in the middle. Jump up
here to get an invisible Auto-fire barrel and an invisible bear
coin.
After a Krumple (big blue crocodile) on the right is a single
banana. This is hiding an invisible bear coin.
Above the O are two barrels. The one on the left can shoot you
over the green Buzz (bee) and onto two ladybugs and into a Bonus
barrel. (Collect 20 stars).
Barrel guarded by Krimp (pink crocodile) go behind waterfall
(trail is broken here) and jump across the gap, pick up an
invisible bear coin.
Where Auto-fire barrel connects two surfaces go right and pick
up Parry (the parallel bird).
Visible bear coin guarded by two Krumps (blue crocodiles).
Defeat both Krumps, get coin and continue right to pick up
invisible red balloon.
Blue balloon for finishing the level with Parry (the parallel
bird).
Right after the "No Birds" sign go right and out from behind the
waterfall. Near the lower ledge is a Bonus barrel. (Collect 60
stars)
At the end of the level, before the flagpole, pick up the metal
barrel and throw it (upwards) to the left while standing under
the Auto-fire barrel behind the waterfall. Immediately jump into
the Auto-fire barrel. You will beat the metal barrel to the
other side, causing Koin (the lizard) to look at you, and
allowing the barrel to hit him in the back. Retrieve the DK
coin.
you should now have: 17
Kreeping Klasps
First shelter at start of game, red balloon on top. Put Dixie on
Kiddys shoulders, throw upwards to retrieve.
After shelter and before Re-Koil (bouncing crocodile) is a crack
in the wharf. Use Dixie to throw Kiddy up in the air and land on
this crack for invisible Bonus barrel. (Bear coin)
Two green Buzzs circling (partially off-screen). Jump up
between them into Bonus barrel. (Grab 15 bananas)
After Bonus level, defeat one Kobble (green crocodile) and go to
higher of two ropes for red balloon. (Top rope is guarded by
Klasp (exploding red barrel)).
Two ropes each guarded by a Klasp (exploding red barrel).
Beneath lower rope is a Bonus barrel. (Find the coin)
DK coin is at end of the level, just before the flagpole. Get
the metal barrel from inside the shelter at the far right.
you should now have: 18
Tracker Barrel Trek
After tracker barrel behind waterfall, use Dixie to helicopter
spin from ledge to the far right into a Bonus barrel.
Tracker barrel right after save point shoots you into arrow
barrel and up onto ledge. After being shot up onto ledge, use
Dixies helicopter spin to float left and down, pick up blue
balloon.
Right after the Ellie (the elephant) barrel, go left using
tracker barrel and find a Bonus barrel guarded by two green
Buzzs (bees) (Bash the baddies).
If you finish the level with Ellie (the elephant) you are
rewarded with a metal barrel. This barrel doesnt get replaced!
Dont leave the screen and dont waste it! You need it to get
the DK coin. Stand behind the waterfall and throw the barrel to
the left. You must keep the barrel on the screen at all times or
it will disappear. As it rolls back towards Koin (the lizard)
move to the right (keeping the barrel on screen) so he will face
you and the barrel will hit him in the back.
you should now have: 19
Fish Food
Hint: Make sure Nibbla (the chomping fish that follows you) always
gets plenty of fish to eat and never eats any Spiny fish. When he
turns red, youre in trouble! Make sure you always take him near the
green or red fish.
Hint: The red fish turn Nibbla (the chomping fish that follows you)
all the way blue, the green ones dont help as much.
Under first spiny, invisible bear coin.
Trail veers off to the right and is guarded by a Spiny. Go in here
(youll have to let Nibbla (the chomping fish that follows you) eat
the Spiny) for a Bonus barrel. (Grab 15 bananas)
Towards the end of the level there a number of narrow channels, each
guarded by a Spiny. The third one over (the first Spiny comes down
from the top, the second Spiny comes up from the bottom, the third
Spiny comes down from the top.) has a Bonus barrel (Bash the
baddies). Allow Nibbla (the chomping fish that follows you) to eat
the Spiny blocking the way.
At the end of the level (In the cave) stand near the flagpole. Put
Dixie on Kiddys shoulders, throw upwards to land on the high ledge
to the left. Get DK coin from Koin (the lizard).
you should now have: 20
Squirts Shadow (Boss)
Hint: The water spray Squirt shoots at you doesnt hurt you, but it
can knock you off the cliffs.
Always make sure your water supply is full.
To get out of the way of the squirting water, just jump onto the
different levels and out of the way of the squirting stream.
To win, shoot Squirt in each of his eyes. 3 hits for each eye are
required to defeat Squirt. (You must hit they eyes one at a time;
you cant shoot one eye three times then the other eye three times.
As you hit an eye it will close and you must aim for the open eye.)
ITEM: When you defeat him, you will be given a ski to match the one
you already have.
Hint: Nows a good time to take the skis to Funky Kong so hell
upgrade your transportation. Now you can race up and over waterfalls
on the map!
Try it out! Go to the bay thats to the left and above the starting
point (Funkys Island). Race up to the waterfall and on into the bay
beyond. Go to Undercover Cove and retrieve another banana bird.
K3
Krevice Kreepers
At the very beginning, throw Dixie straight up to retrieve 3 bunches
of bananas.
Top of channel where the K is, up and left, invisible bunch of
bananas.
Follow the trail and the first time you have to leave the rope and
walk on rock, head right and down to get a visible bear coin.
Above this channel and to the left (next one to the left of where
the small log platforms start) is and Auto-fire barrel to the first
Bonus barrel. (Collect 30 stars).
To the left of the 'O' (for K-O-N-G) is a metal barrel. Pick it up
and head left, you will use it to get the DK coin on the rock above
you. Throw the metal barrel straight up at the opposite end of the
ledge where Koin is standing. You must race it left to Koin and get
there in time to make Koin face you.
Just right of where you threw the barrel up, invisible bear coin
(Use Kiddy to throw Dixie straight up).
At the N have Kiddy throw Dixie up and right to get to another
Bonus barrel. (Find the coin) (HINT: Look out for the green running
barrel at the top)
you should now have: 21
Tearaway Toboggan
At the very beginning, use the spinning barrel to shoot down and to
the left of the red Buzz (bee) that is underneath this barrel. (Bash
the Baddies)
Towards the end of the level (just past the G) is an arrow made of
bananas. Stay on the ground (as opposed to jumping on the roof of
the cabin) to hit the other Bonus barrel (Collect 50 stars)
At the far end of the level, past the flagpole is the DK coin. The
metal barrel is to the left at the top of a bluff, the DK coin is to
the right. (Put Dixie on Kiddys shoulders, throw upwards to get to
the top of the bluff)
you should now have: 22
Barrel Drop Bounce
At the first Auto-fire level, get blasted to the higher level and
use fDixies Helicopter spin to go to the far right for a metal
barrel and, lower down, the DK coin. (HINT: This one is tricky! Take
the barrel down to the next level (in between where you picked it up
and where Koin is) and throw it to the right. Once the barrel hits
the far wall (dont let if off the screen!) you can run just ahead
of it to Koin. Go past Koin so the barrel will hit him in the back.
From the K go left (using the floating barrels). Once on the left
ledge, use these barrels again to go to the far right for a Bonus
barrel (Grab 15 bananas).
After the N go right (as Dixie) and use Helicopter spin to go to
the far right. Jump on a floating barrel and up into Bonus barrel.
(Find the coin)
The G is at the end of the level (past the flagpole) as a fat red
bird. Use the barrel provided to get the G.
you should now have: 23
Krack-Shot Kroc
After first vat of pink lava look for a gap in the ceiling
structures. Use Squitters webs to climb up into this gap for a
Bonus barrel. (Grab 15 bananas)
A short ways after the N and after several vats of the pink lava
(guarded by red bees), climb a channel and to the right youll see a
DK barrel at the top of the screen. Use Squitters webs to go up and
left to find another channel. At the top right of this channel (gap)
is a Bonus barrel (Bash the baddies)
After returning from the Bonus level go up and left to a shield.
Behind this shield is the G.
At the end of the level, just before the "No Spiders" sign is the DK
coin. Go past this sign to turn Squitter into a barrel.
you should now have: 24
Lemguin Lunge
At the beginning of the level, directly over the red bee, is the
first Bonus barrel. Put Dixie on Kiddys shoulders, throw upwards to
get in. (Find the coin) (HINT: If you stand in front of the bigger
pine tree at the very beginning of the level and throw Dixie up and
right youd be in just about the right position to hit the barrel on
the first try).
Right after the O youll find Koin. Pick up the metal barrel and
stand on his shield and throw the barrel to the left. Remain on his
head until the barrel comes back.
Just to the right of the G is the other Bonus barrel. Go over the
cabin and with the Lemguins to the left to get it. (Collect 30
stars)
you should now have: 25
Bleaks House (Boss)
The boss takes 6 hits to defeat.
HINT: Theres a blue snowball marker on the left that indicates how
far your snowball range currently is. To switch between near and
far, use the up / down keys.
HINT/ITEM: This would be a good time to give Barter Bear the mirror
youve been carrying around (if not, go buy it for 50 Bear coins and
bring it back here). He will trade you a wrench for it.
After you get the wrench, bring it to Funky Kong (nothing really
happens, he just promises "The Ultimate Ride" in exchange for some
more DK coins).
Razor Ridge
Buzzer Barrage
HINT: This level has a lot of Kopters. You can't kill them, so
avoid them!
First fat red bird has a silver bear coin (drop a barrel on
him).
Second fat red bird has the 'K' (drop a barrel on him).
Right after the 'K' a Kopter blocks the way. Get past him to
where you see a red Buzz (bee) blocking a channel on the lower
part of the screen. Below the red Buzz is a green buzz. Use the
barrel on the right to defeat the green Buzz and head down to
the bottom of this channel for a Bonus barrel. (Bash the
baddies)
Under the two red Buzz's (after the metal barrel) is a fat red
bird. Pick up the metal barrel and drop it so it rolls left onto
the bird for the 'O'.
HINT: Further on you'll have to descend a channel in between
two Kopters. At the bottom of this channel is a green Buzz
(bee), so look out! After this you'll find three Kopters and
then, FINALLY the save point.
After the save point, drop metal barrel on the two green Buzz's
(bees) blocking the channel to the right. At the bottom of the
channel and left is the DK coin.
Towards the end of the level are three green Buzz's (bees) one
on top of the other. Use a barrel to defeat the top Buzz and get
the 'G'.
After the "No Parrots" sign , bounce on Kopter's head (the
yellow propeller thing) and continue to bounce till you get to
the second Bonus barrel. (Collect 40 stars)
you should now have: 26
Kong Fused Cliffs
Hint: This one is hard! You climb ropes that burn like fuses, so
there's no going back. If you see something (like a barrel) take
it as soon as you can, you won't get a second chance.
Just above two circling Buzz's (the green bees) jump from one
rope to the right (only if you're Dixie!) and onto another. If
you're Kiddy, you can jump on the rock below the circling bees
and jump up and right to the Bonus barrel. A banana trail slopes
to the right, to a Bonus barrel. (Find the coin)
Where there are three green Buzz's (bees) going back and forth,
use Dixie to follow a banana trail to the right for the second
Bonus barrel.
Towards the end of the level at the end of the last rope, go to
the left onto a platfrom for the DK coin. Koin is inside a cave
(you can't see him) and you have to throw Dixie overhead to get
the metal barrel needed to defeat him. (The flagpole is at the
right).
Hint: This would be a good time to go to Bjorn's Chairlifts to
give him the wrench; now you can get to Clifftop Cache and get
another banana bird.
you should now have: 27
Floodlit Fish
Hint: Get Enguarde (the swordfish) at the beginning (lower
right) and continue to stab the Koco's (clown fish) to light up
the scenery.
There is a red and white Koco (clown fish) to the left right
after the first yellow and white Koco. Stab him for the 'K'.
After the 'K' you descend a channel where first one, then
another red fish swims back and forth rapidly. (After the 4th
yellow and white Koco.) After the 2nd fish, descend and bear
right for the first Bonus barrel. (Collect 90 stars)
Towards the end of the level, after the 'G', defeat two Spiny's
to get to the second Bonus barrel (visible at upper right of
screen). (Collect 40 stars)
The DK coin is visible just before the flagpole at the end of
the level. Throw Dixie up and left to get the metal barrel
needed to defeat him.
you should now have: 28
Pothole Panic
Hint: If you get right next to Kuchuka (the purple barrel that
throws bombs), he will throw his ammunition over your head.
First fat red bird has the 'K.'
After the save point, when you go into the water (to the right)
go left to get the 'N' with Ellie (the elephant).
Above the 'N' is a Bonus barrel. (Collect 20 stars)
Hint: Jump out of the water and press the 'X' button to jump off
of Ellie's back and into the barrel.
At the end of the level just before the "No Spiders" sign, use
Squitter to build webs up to where Kuchuka is throwing bombs
(the purple barrel). Above Kuchuka is a Bonus barrel (Collect 15
bananas)
The DK coin is on the ledge above the flagpole. You need Kiddy
and Dixie to get it; he has to throw her up on the ledge and
then to the left to get the metal barrel.
you should now have: 29
Ropey Rompus
Get the TNT barrel under the 'K' and jump as far right as
possible. The TNT barrel will create an opening so you can go
through a tunnel to the first Bonus barrel. (Find the coin). You
don't have to get all the bananas to get this coin.
You must pass the "No Parrots" sign with Parry (the parallel
bird) to get the 2nd barrel (right after the 'G'). (Grab 15
bananas.)
Towards the end of the level (before the 'G' and the flagpole)
there is a stationary red Buzz (bee) being circled by a green
one. To the left of this there are 3 green Buzz's (bees) in a
horizontal row on a rope. Fall down from the rope in between the
3 horizontal Buzz's to get the DK coin.
you should now have: 30
Barrus Barrier (Boss)
This one is hard! It is done in 3 stages:
First step:
Hit the green Spiny's so that they ricochet off the wall and hit
the pink Spiny's.
Second step:
The squid missiles only go in one direction - they follow you.
Attract them to the pink things and let them do the work for
you.
Third (and final) step:
When Barrus is fully open, stab him in the middle with Enguarde
(the swordfish). It takes 6 hits to defeat Barrus (not counting
steps 1 and 2.
ITEM: For defeating this boss you get a Bonus coin.
Kaos Kore
Konveyor Rope Klash
Where there's a Konveyor rope with two stationary Buzz's (bees)
and one who goes back and forth, with a banana trail on the
ground below, drop down off the rop for the first Bonus barrel
(Collect 30 stars)
Just past halfway, on the rope where there are two Buzz's (green
bees) circling around three bananas, jump up and left at the
left side of the rope for a Bonus barrel (it's in the tree).
(Grab 15 bananas)
Towards the end of the level the DK coin is visible just to the
left of the end of level flagpole.
you should now have: 31
Kreepy Caverns
After the Ghost barrel that is between 2 red Buzz's (bees) go up
and to the right. Cartwheel jump left (to the opposite
ledge-works best with Dixie). Use Kiddy to throw Dixie up into
the first Bonus barrel (Collect 50 stars)
After the save point at the top of the screen you'll see a green
Buzz. Use a barrel to defeat him, and throw Dixie up into an
Auto-fire barrel to get Squitter (the spider).
Before going down at the 'N' (just before the "No Spiders"
sign), go up where you can see a single banana right beside a
Ghost barrel. Use Squitter to climb up this channel for the
second Bonus barrel. (Find the coin)
Bear coin for finishing this section as Squitter (the spider).
When you find a metal barrel directly under a Ghost barrel, you
are near the DK coin (It's to the right). You have to throw the
metal barrel up in the air (to make it roll slowly) then use the
Ghost barrel to shoot yourself over to Koin ahead of it (so you
can make him face away from the barrel)
you should now have: 32
Lightning Look-Out
Hint: A smaller lightning flash preceeds the larger (lethal)
lightning flash. Now you can tell when it's coming!
Small pond under the 'O', Bonus barrel at the bottom. (Bash the
baddies)
The DK coin is visible under two fat red birds. Stand directly
under the first bird to make the lightning hit him. This will
drop a wooden barrel. Use the wooden barrel to hit the second
bird so it will drop a metal barrel, which you can use to get
the DK coin.
After the save point, above three barrels you'll see a Bonus
barrel.
you should now have: 33
Koindozer Klamber
Hint: This level is easier with Dixie in the lead. Try to use
the helicopter spin to land directly on top of the pink
Koindozer's (the pink lizards with shields).
The first Bonus barrel is above the first Bazuka. (Collect 30
stars)
Right after the save point and past the 'N' another Bonus barrel
is hanging between a Koindozer (pink lizard with shield) and a
Re-Koil (bouncing alligator).
To get the DK coin, you have to get to the Switch Barrel (use
the horizontal rope) and change the barrels to metal. Now you
can jump on the shooting barrels to get back to Koin for the DK
coin.
you should now have: 34
Poisonous Pipeline
Hint: While in the poisonous pink substance in the pipeline,
your controls will be reversed (left = righ and vice versa) - be
warned! (These directions are given according to the direction
you should really go, NOT according to the swapped controls!
i.e., if we say go right, go right on the screen, using whatever
button makes you go right)
If it helps you, try turning the controls upside down to
compensate for the right/left switching. If it doesn't help you,
don't do it.
The first Bonus barrel is after you've gone left for a while.
You'll see a fish swimming back and forth between two sea
urchins, behind them the barrel is visible.
After the "No Swordfish" sign, you'll see two fish swimming from
left to right continuously, right after the Spinys. Go left
past three Spiny's (instead of going up) and down between two
Spiny's and you'll find the 2nd Bonus barrel. (Collect 30 stars)
The DK coin is visible at the end of the level to the left of
the flagpole.
you should now have: 35
Kaos Kastle (Boss)
When you beat this one, don't be surprised if you get a glimpse
of an old friend. But good luck beating this guy, you'll need
it!
Hint: When being chased by Kaos, set the barrel down and hunker
down to the ground.
Use barrels on the right and left side of the screen to bounce
off the boss' head. The machine will go away to reveal Kaos at
the controls.
Two blue handles drop at the top of the screen (right and left
sides again). Hang from these to drop barrels down for you to
use.
Throw barrels at Kaos' jetpack to defeat him.
Be careful when he pulls out his remote control! He will use it
to turn on an electric force field at the bottom of the screen.
Hang on to the blue handles for safety (there are three now) or
stand on the platform at the right or left of the screen (it
changes sides).
ITEM: A bonus coin.
Krematoa
"The Lost World"
Stampede Sprint
Hint: Keep watching to the right - you're going to be running
through this level as Ellie (the elephant) and won't be able to
stop!
The first Bonus barrel is right above the cliff at the start of
the level. Have Kiddy throw Dixie up into it. You'll play this
one using Squawk.
When you return from the first Bonus barrel you will still be
using Squawk. Go to the left to the second Bonus barrel
(partially hidden by leaves). You'll play this one using
Squitter.
If you can make it to the end of this level with Parry intact,
you get another Bonus barrel. I can't tell you what this one
does, because I haven't been able to do it yet! (Thanks to Don
Millar for this tip!)
fMake it to the end of the level to get the DK coin, which is in
plain sight just beyong the end of level flagpole.
you should now have: 36
Kris Kross Kliffs
To the right of a DK barrel are two red Buzz's (bees). Behind
the Buzz's is a Bonus barrel.
When you see three Re-Koils (bouncing alligators), go up and to
the right. Go to the far right and use Kiddie to throw Dixie up
into the Bonus barrel.
After the Bonus barrel fall down and to the right of the DK
barrel.
you should now have: 37
Tyrant Twin Tussle
Right before the "No Spiders" sign use Kiddy to throw Dixie
straight up for a Bonus barrel.
After the save point, just before the 'N' is another Bonus
barrel.
At the end of the level get the single banana at the flagpole.
The DK coin is just before the first Bonus barrel and is in
plain sight..
you should now have: 38
Swoopy Salvo
Right after the 'K' enter the next tree and go down. When you
come out of the tree that has the bananas in a curved shape in
it, go upwards and enter the tree that has all the Swoopy's
(woodpeckers) coming out of it. In that tree are 2 red Buzz's
(red bees) circling a banana really fast. The banana is the
Bonus barrel!
Just past the save point go out of the tree and jump up and left
(using the Swoopy's) for the 2nd Bonus barrel.
Right after the 2nd Bonus barrel you see a "No Parrot" sign.
Here you can get a metal barrel to defeat Koin (you can't miss
him).
"Swoopy salvo is very difficult. I had trouble finding the third
bonus room but finally found it. Good luck."
-Angie Hance
you should now have: 39
Rocket Rush
The DK coin is at the end of the level at the flagpole in plain
sight
you should now have: 40
This is the time to use those DK coins to get your ride
upgraded! Take your stash to Funky Kong and see what you get...
.
Knautilus (Boss)
Nothing left to tell! Good luck!!!
"I finally got it.... You have to leave the barrel on the ground
until the bolt of electricity hits it and disappears and then
you can pick it up."
-Angie Hance
About the Banana Birds
1. Kong Cave
Kong Cave is left of the Save Cave on the first (main) island (left
of Funky Kong)
2. Bounty Beach
Bounty Beach faces Funky Kong's Rentals. It's on the other side of
the little inlet, just up from the entrance to Lake Orangatanga.
3. Smuggler's Cove
In Lake Orangatanga head for Tidal Trouble, but go under the bridge
instead. The beach at the back of this small bay is Smuggler's Cove.
4. Barnacle's Island
In the middle of Lake Orangatanga is Barnacle's Island. You can
trade Barnacle Bear a shell for the Banana Bird he has in a cage.
5. Undercover Cove
You have to have the Turbo Ski to get to this one. (You get the
Turbo Ski after defeating Kaos Karnage (get one ski) and Squirt's
Shadow (get the other ski) and taking both skis to Funky Kong).
Undercover Cove is up and behind Kong Cave. (Use the 'Y' button to
race towards the waterfall, the Turbo Ski will go up and over and
take you to Undercover Cove).
6. Arich's Hoard
Beat Brash Bear's time (1:15 - watch the timer in the lower right
hand corner) in the Riverside Race. Afterwards, visit Brash Bear,
who will get really mad that you've beat his record. He will start
pounding on the desk of his shop as you leave and the pounding will
keep up until he has dislodged a log, which will float down the
river and form a bridge from Bobbing Barrel Brawl to Arich's Hoard.
7. Bounty Bay
At the beginning of Cotton-Top Cove, before you go into Bazza's
Blockade, go to the right instead. Bounty Bay is the small beach to
the right of the waterfall.
8. Sky-High Secret
Go to Blizzard's Basecamp (in K3) and he'll give you a present. Take
it to Blue's Beachhut (in Cotton-Top cove), he'll unwrap the gift,
(a bowling ball) and give it back to you. Now take the bowling ball
to Bazooka's Barracks (on Mekanos) and give it to him. He'll use his
cannon to shoot you to the Sky High Secret.
9. Glacial Grotto
When you come out of Blizzard's Basecamp (on K3) go to theleft (it
doesn't look like you can, but you can).
10. Clifftop Cache
Go to Barter's Swap Shop (left of the entrance to K3) and give him
the mirror, he'll give you a wrench in return. Take the wrench to
Razor Ridge and give it to Bjorn (he's the 2nd bear in this level).
Bjorn will use the wrench to adjust his chairlift and you can then
have a ride to the Clifftop Cache.
11. Bramble's Bungalow
Take a flower to Bramble's Bungalow and he will trade you for a
Banana Bird.
12. Sewer Stockpile
Swim around the 2 rocks in a figure-8 pattern, to reveal a sewer
pipe, inside is another banana bird.
13. K's Kache
You'll need the Gyrocopter to get to this one. (Requires 41 DK coins
to purchase from Funky Kong.
14. Hill Top Hoard
This one isn't very obvious because the name doesn't show up. Use
the Gyrocopter to get to the upper right hand corner of the main
map. Press the start button.
15. Belcha's Burrow
This one is a little tricky. Use the Gyrocopter to go down from the
first Save Cave on the main map. When you can't go down any further,
press the start button.
About the Bears
Bazaar's General Store
Here you can buy a shell (2 Bonus coins) and a mirror (50 Bonus
coins). He also says he has some information for sale, but I didn't
find it to be very useful (Who owns the castle? (He doesn't know)
and how many caves are there? (13))
Barnacle's Island
You can trade a this bear a shell for one of the Banana Birds.
Blunders Booth
'Accidentally' gives you tips to search near the rocks.
Brash's Cabin
Throws a tantrum when you beat his time in the Riverside Race (1:15)
and pounds on the counter until he dislodges a log that forms a
bridge to Arich's Hoard and another Banana bird.
Blue's Beach Hut
When you bring this bear the present from Blizzard's Basecamp, he'll
open it (it's a bowling ball) and give it back to you (to take to
Bazooka's Barracks).
Bazooka's Barracks
Bazooka will use the bowling ball from Blue to shoot you up to
Sky-High Secret, where you can get another Banana bird.
Bramble's Bungalow
When you've completed Razor Ridge you can walk up the path near
Bramble's Bungalow where you'll find a flower, which you can take to
Bramble. He'll give you another Banana bird.
Blizzard's Basecamp
Blizzard's Basecamp is above the Lemguin Lunge. When you leave
Lemguin Lunge press the 'up' key to get there (otherwise you'll go
along the regular path instead). Blizzard will ask you to take a
present to Blue (the bowling ball).
Barter's Swap Shop
Barter will trade you the mirror (50 Bonus coins, from Bazaar's
General Store) in exchange for a wrench. You'll need this wrench to
take to Bjorn's Chairlift.
Benny's Chairlift
When you defeat Buzzer's Barrage, you can use Benny's Chairlift to
get to the Kong-Fused Cliffs.
Bjorn's Chairlift
When you give Bjorn the wrench he'll adjust his chairlift and allow
you to take it to where you can get another Banana bird.
Baffle's Code Room
Go back to Barter bear and buy the mirror back again (it's only 10
bear coins now. Bring the mirror back to Baffle and he'll give you a
lame clue about a "figure." What he's trying to tell you is that you
need to do a figure-8 around the two rocks in the middle of Kaos
Kore to get to another Banana bird.
Boomer
Boomer charges 15 coins apiece to remove the obstacles in Krematoa
(the Lost World). Once the obstacles are removed you don't have to
pay every time.
Cheat Codes:
Press L,R,R,L,R,R,L,R,L,R on the Game-Select screen. From there,
select the following:
LIVESStart the game with 50 lives
MUSICPerform a sound test
MERRYChanges the bonus levels to a Christmas theme.
(You get balls instead of stars, presents instead of
bananas, etc.)
COLORChanges Dixie and Kiddy's clothes! Dixie's
outfit changes to purple and Kiddy's changes to
green.
WATERCan't tell what this does yet.
HARDRSupposed to make the game harder, but I can't
tell any difference...
TUFSTNo more saving your game at the halfway point!
ASAVEAutomatically saves your game every time you
finish a level.
ERASEHaven't been brave enough to try this one yet!
If
you try it and know what it does, let me know...
"I have tried this on copied games. It just erases
the game that the code was done on." from: Dado,
1/3/97 - thanks Dado!
That's the end...Now PLAY NICE!